


How to Install a License Plate Mount Backup Camera

A proper license plate mount backup camera should show a useful 10-by-20-foot area behind the vehicle, receive power from the reverse-light circuit, and be pitched so the ground immediately behind the bumper remains visible. Rearview cameras reduced police-reported backing-crash rates by an average of 16 percent in one IIHS analysis, but only when the complete system gives the driver a dependable view.
You're probably considering one because the factory screen is missing, the vehicle is too old for built-in camera equipment, or the view behind a truck, Jeep, or SUV disappears beneath a tailgate or spare tire. The installation may look simple from outside. Attach the plate bracket, run a cable, connect a display, and select Reverse.
That approach misses the parts that determine whether the camera helps. Camera position, image coverage, reverse-trigger wiring, weather sealing, and calibration matter more than a product page's impressive viewing-angle number. A camera that points too high can hide the near-ground area. A loose ground can create a flickering image. A wireless system can work in one driveway and become unreliable around a metal-bodied vehicle or trailer.
Table of Contents
- Why a License Plate Mount Backup Camera Matters
- Choosing the Right Camera for Your Vehicle
- Mounting the Camera Securely
- Wiring to Reverse Power and Display
- Integrating with Your Display System
- Troubleshooting Common Installation Issues
Why a License Plate Mount Backup Camera Matters
Backing out of a tight garage gives you very little room for error. A child's bicycle, a low bollard, a parking curb, or the corner of another vehicle may sit below the line of sight from the driver's seat. Mirrors help with the sides, but they don't show every object directly behind the bumper.
A license plate mount backup camera adds a centered rear view without requiring a replacement tailgate handle or a large body modification. That makes it a practical retrofit for an older sedan, pickup, Jeep, SUV, or small RV. The plate location also provides a useful reference point, although the camera still has to be positioned around the specific bumper, hitch, spare tire, and tailgate arrangement.
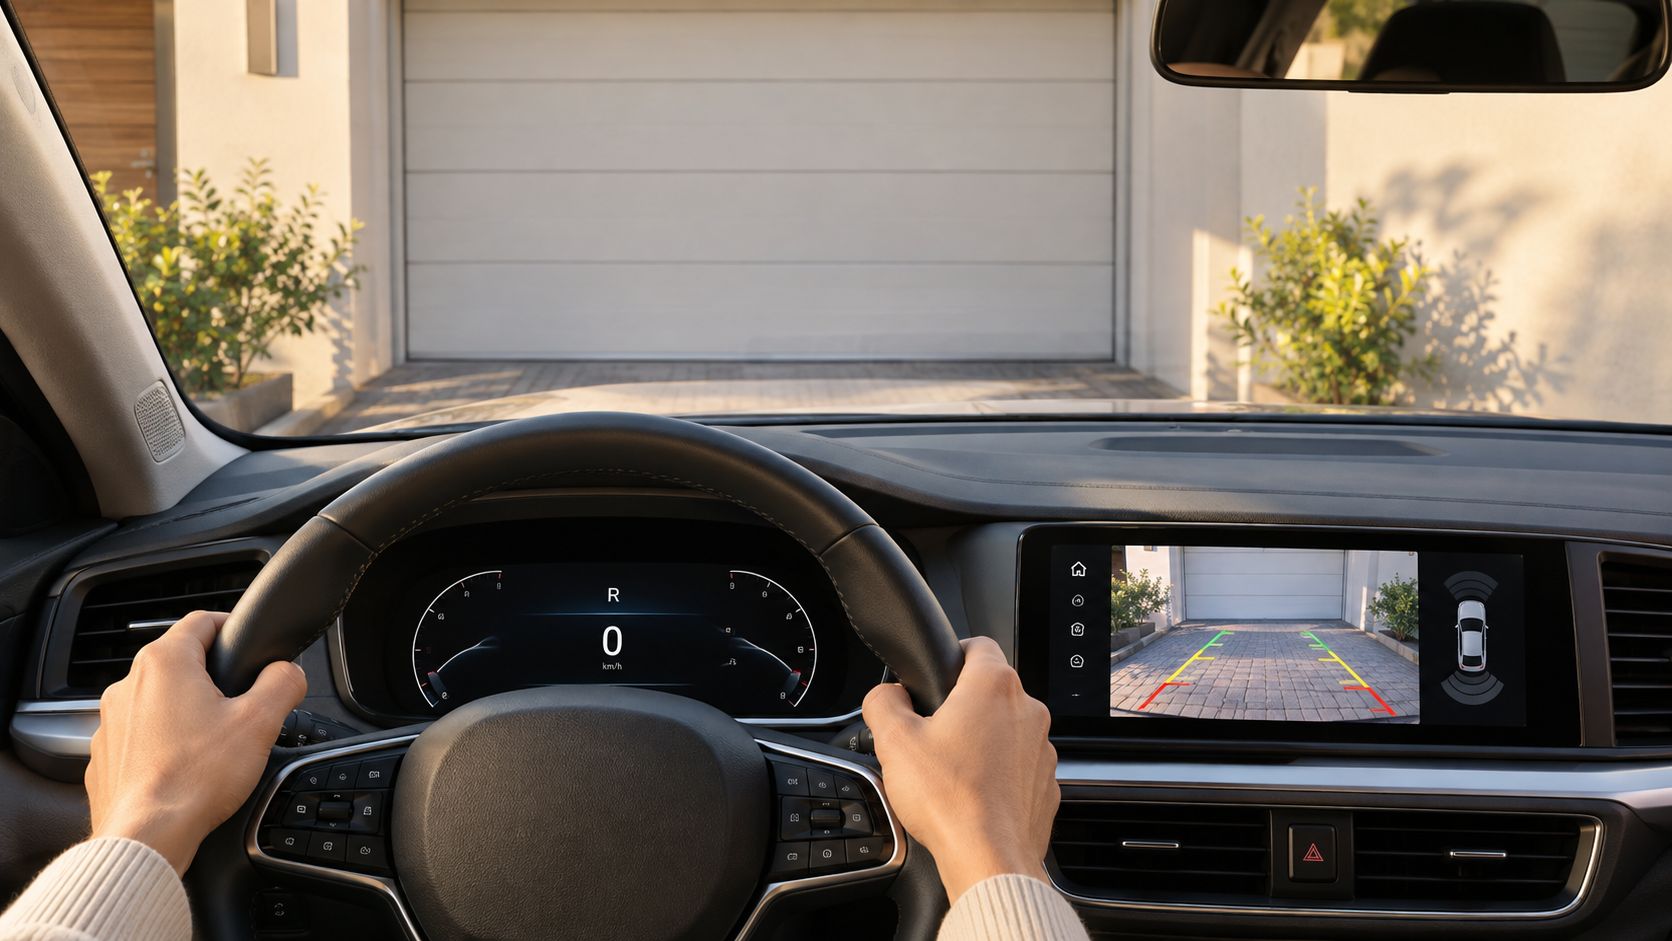
A safety aid, not a permission slip
Rearview cameras became part of a broader U.S. vehicle-safety transition during the 2010s. Federal rules required rear-visibility technology on new passenger vehicles, trucks, buses, and other vehicles weighing less than 10,000 pounds by May 2018, with the requirement based on a defined visibility zone rather than one particular camera style. The Insurance Institute for Highway Safety's rearview-camera research found an average 16 percent reduction in police-reported backing-crash rates across vehicles from four manufacturers.
The result wasn't identical for every driver or vehicle. The measured reduction ranged from 14 percent to 23 percent by manufacturer, while drivers aged 70 and older experienced a 40 percent reduction compared with 15 percent for younger drivers, according to the same IIHS summary.
Practical rule: Treat the screen as an additional set of eyes. Keep checking mirrors, look over your shoulder, and reverse slowly.
That distinction matters for Delaware drivers adding a camera to an older vehicle. You're improving visibility, not turning an aftermarket bracket into factory-certified equipment. The useful outcome is a clean, stable image that helps you identify the bumper edge, immediate ground, and objects farther behind the vehicle before you move.
Choosing the Right Camera for Your Vehicle
The first specification to question is the advertised viewing angle. A product may list 130° or 180°, but those figures describe the lens angle, not the useful safety area on your particular vehicle. NHTSA materials on rear visibility explain that U.S. rear-visibility rules focus on showing a 10-by-20-foot area directly behind the vehicle, along with image size, response time, durability, and activation.
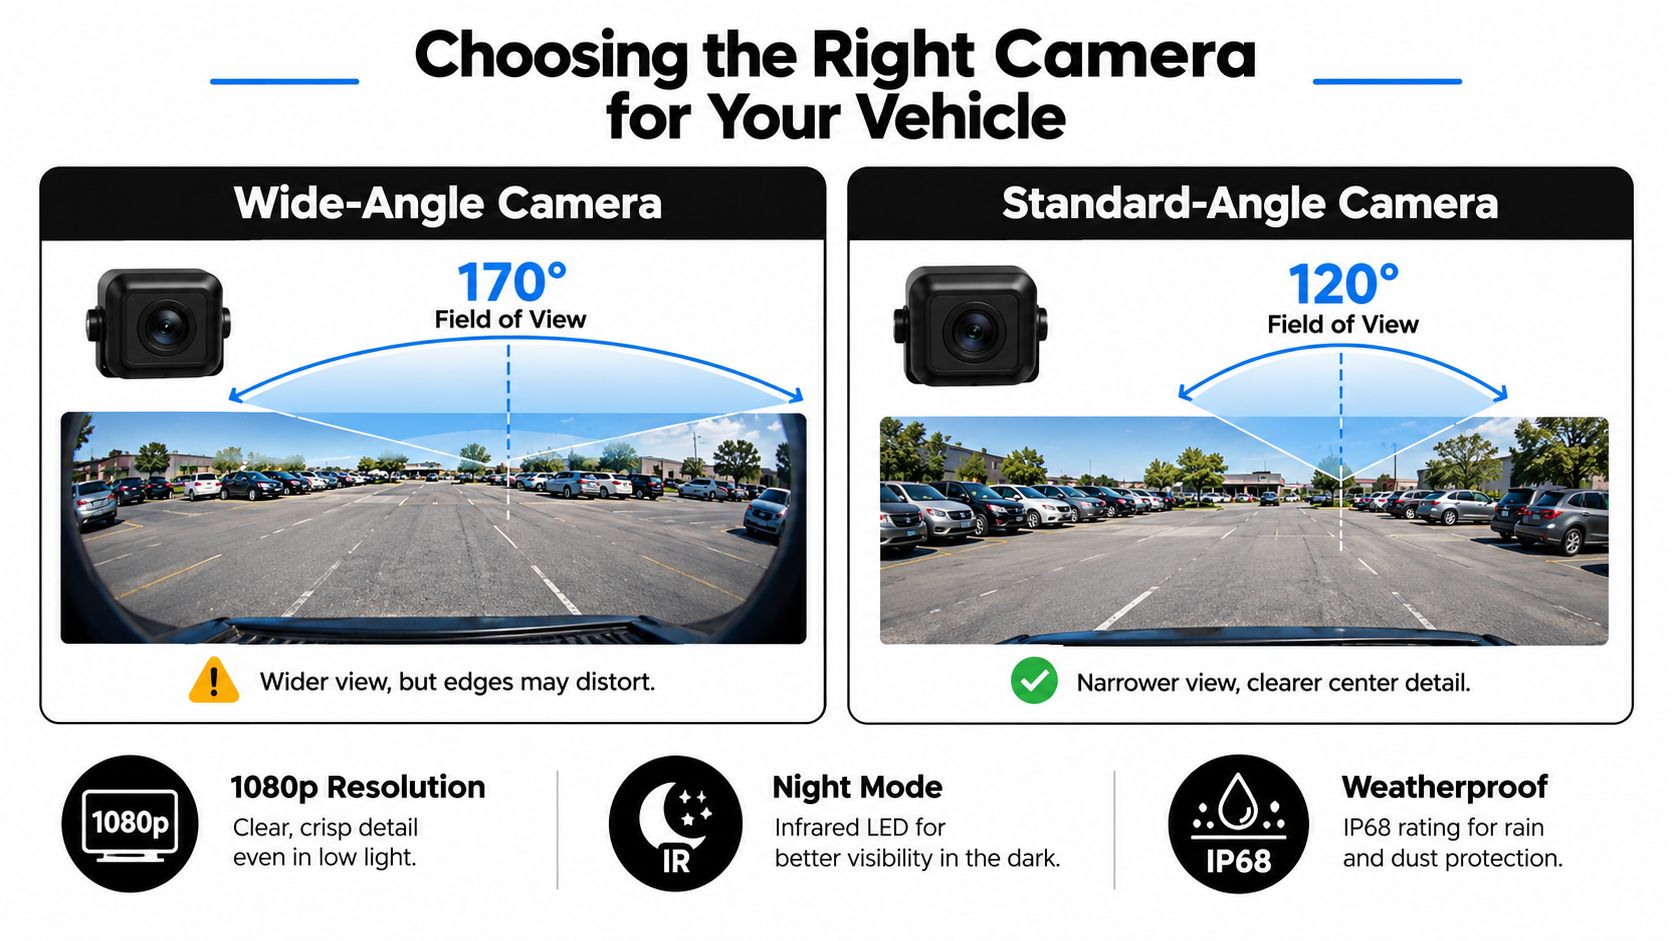
A very wide lens can reveal more laterally, but it can also make objects appear smaller and distort distance near the edges. A narrower camera may show clearer center detail, yet leave a blind strip beside a lifted truck or Jeep. Neither is automatically safer. The camera must work with the height and shape of the vehicle.
Shop for useful coverage
Before buying, check the following points:
- Bumper reference: The lower part of the image should show enough of the bumper or rear edge to help you judge distance.
- Near-ground visibility: Confirm that the camera can show the area immediately behind the bumper, not just distant traffic.
- Night performance: Look for a usable image under reverse-lamp illumination. Infrared lighting can help, but excessive infrared reflection from a nearby surface can wash out the picture.
- Weather protection: The lens seal, cable entry, and plate bracket must tolerate rain, road spray, snow, mud, and repeated washing.
- Vehicle fit: Check whether the plate is centered, offset, recessed, or close to trim that could block the lens.
- Signal type: Match the camera output to the head unit or monitor. A composite camera needs a compatible composite input, while a digital camera requires the correct receiver or interface.
Delaware weather makes sealing more than a marketing detail. Water entering through a poorly protected cable hole can cause intermittent video long after the installation appears finished. A wireless camera also deserves an honest evaluation. It may save a long video run, but it still needs reliable power, and the radio link can introduce startup delay, interference, or pairing problems.
A good selection test is simple. Temporarily hold the camera at the intended plate height, connect it to the proposed display, and check the view with the trunk, hatch, tailgate, spare tire, hitch, and any lift equipment in their normal positions. If the image doesn't show the bumper edge and nearby ground before permanent mounting, changing to a camera with more advertised degrees won't solve the geometry.
Mounting the Camera Securely
The plate bracket is the camera's foundation. If it shifts after a few months of vibration, every parking overlay and distance judgment becomes misleading. Start with a clean mounting surface and place the bracket on the vehicle centerline where possible, while keeping the license plate, plate lighting, trim, and hatch movement clear.
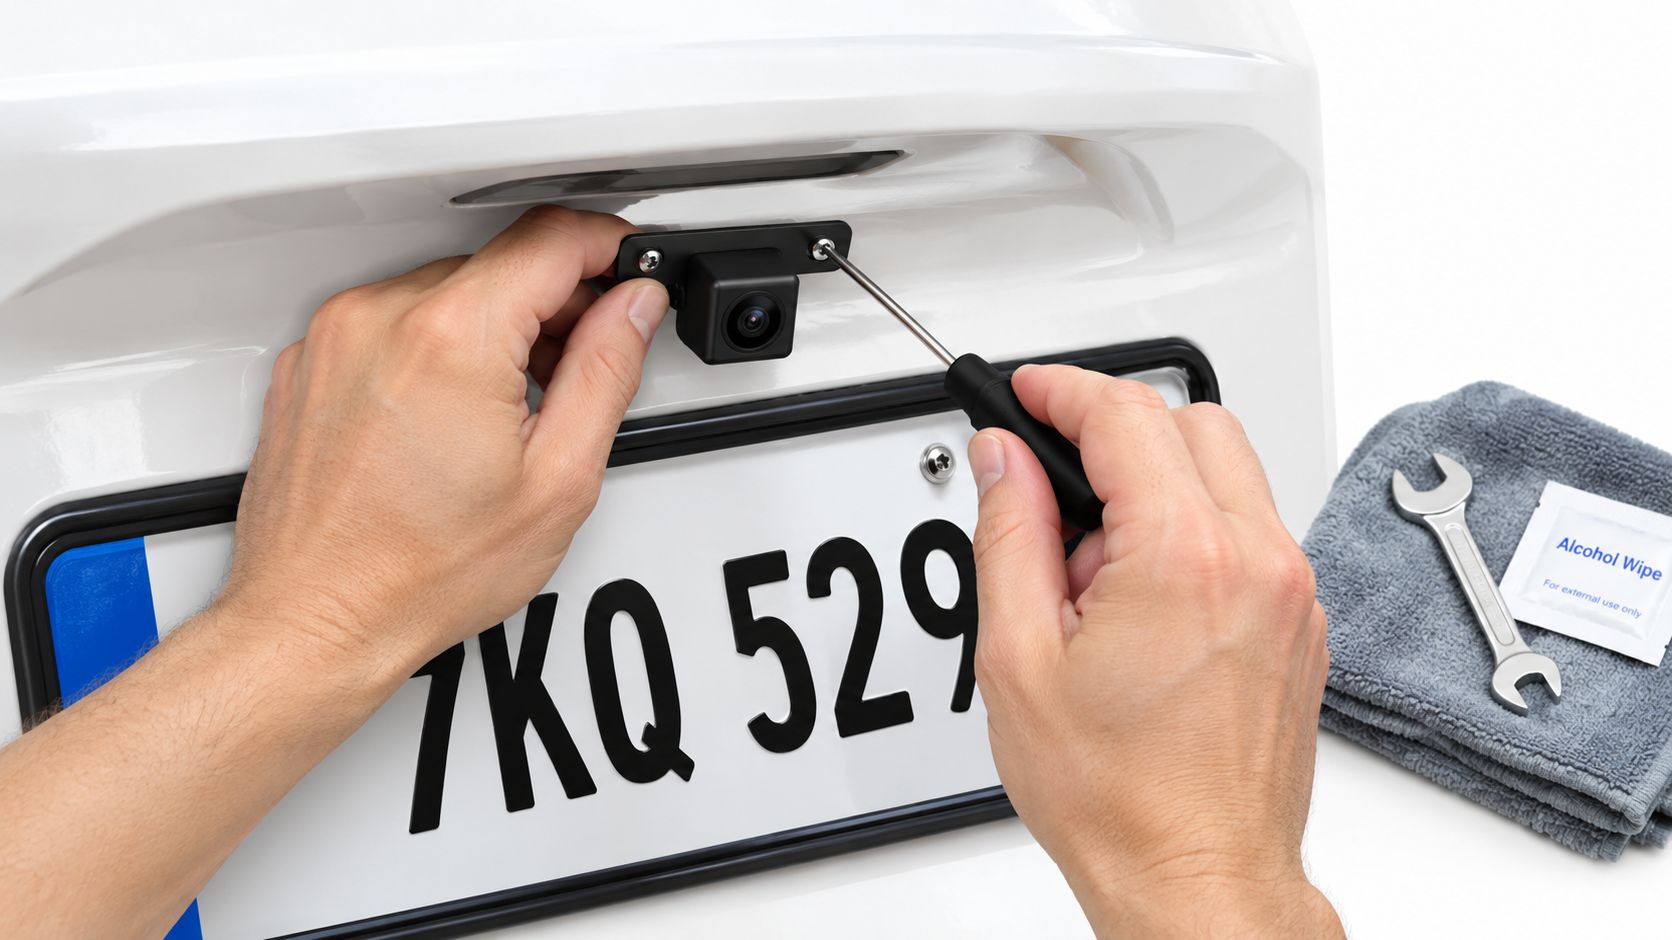
Build the mount around the vehicle
A reliable installation usually follows this order:
- Test the position first. Hold the bracket in place and view the image from the driver's seat. Check the bumper edge, nearby pavement, outer corners, hitch, and spare tire.
- Center the bracket laterally. An offset camera can make a straight path look angled and can hide one side of the vehicle.
- Protect the plate and trim. Don't let the camera housing cover required plate characters or lighting. Confirm that the hatch or trunk can open without pulling the cable.
- Secure the fasteners. Tighten the bracket so it won't vibrate, but don't deform a thin plate panel or crack plastic trim.
- Seal every entry point. Use an existing protected grommet whenever possible. If a new passage is unavoidable, protect the cable from the metal edge and seal the opening against water.
- Leave serviceable slack. The harness needs enough movement for a hatch or tailgate, but loose cable should never hang near a hinge.
The FMVSS 111 rear-visibility benchmark defines a field extending 20 feet rearward and 5 feet to each side of the vehicle centerline, assessed with seven test objects. You shouldn't assume a plate-mounted camera meets that benchmark just because the lens is wide. Place visible markers behind the vehicle, select Reverse, and adjust the pitch until the bumper edge is present without taking over the bottom of the image.
A camera aimed upward may show more distant traffic while hiding the short obstacle that matters most during the first few feet of movement.
Account for trucks and Jeeps
A standard sedan often has a predictable plate height and a clear rear panel. A lifted truck may put the plate low beneath a large tailgate, while a Jeep may have a spare tire, aftermarket bumper, or tow hitch affecting the lower frame. On these vehicles, test the actual configuration rather than copying the angle from a different model.
The cable deserves the same attention as the bracket. Run it through a protected grommet, keep it away from moving hinges and airbag wiring, and secure it so road vibration doesn't work the connector loose. Inspect the lens seal and cable entry for water protection, then test for glare from plate lamps, reverse lamps, snow, mud, and road spray.
Use the following video as a visual reference for the physical installation, but treat your own vehicle's bracket position and cable route as the controlling details.
After securing the bracket, close the trunk or tailgate, flex the harness near the hinge, and shift repeatedly between Park and Reverse. The image should remain stable. Record the final pitch and centerline position so another technician can restore the setup if the plate frame is removed later.
Wiring to Reverse Power and Display
Most camera failures begin in the wiring, not in the lens. A proper installation needs a dependable reverse trigger, a clean ground, protected video routing, and connections that can survive vibration and moisture.
Begin by identifying the reverse-light circuit with a test light or multimeter. With the vehicle safely secured, the circuit should become active when Reverse is selected and inactive when the vehicle leaves Reverse. Wire colors aren't universal, so don't rely on a diagram from another trim level or model year. Verify the circuit at the vehicle, then connect the camera's power lead and trigger according to the equipment instructions.
Make the power connection dependable
A quick twist-and-tape splice may work during the first test and fail after the vehicle experiences heat, moisture, and bumps. Use a suitable sealed crimp connector or a properly made soldered connection with protection against movement. The camera ground should attach to a clean, secure grounding point, not to painted metal or a loose trim fastener.
Avoid constant-power circuits unless the camera and control module are specifically designed for that arrangement. A camera that remains energized can create unwanted battery drain or leave the display active when the vehicle is parked. The reverse-light circuit normally provides the activation signal, but some vehicles use a monitored lighting system that may require an interface rather than a direct tap.
Route the video cable from the rear toward the dashboard along a protected factory path. Keep it away from exhaust heat, sharp brackets, seat tracks, hinges, pedals, and moving suspension or body components. Don't run it across airbag deployment zones or bundle it tightly against wiring that carries substantial electrical load.
Check the whole signal path
A technically sound installation must be tested as a visibility and environment system. The federal rear-visibility rule update emphasizes measuring the displayed image rather than assuming a wide lens is sufficient, along with checking vibration, watertight cable entry, glare, and image stability during harness movement.
Use a simple test sequence:
- Power: Verify the camera receives the intended voltage only when the system should operate.
- Ground: Measure for a solid ground connection and inspect for paint, corrosion, or loose fasteners.
- Trigger: Confirm the display changes promptly when Reverse is selected and returns to its normal source afterward.
- Video: Inspect the cable for crushed sections, tight bends, loose adapters, and poorly supported connectors.
- Movement: Operate the hatch or tailgate and flex the harness while watching for flicker.
- Environment: Test in daylight and darkness, then inspect the image after exposure to normal glare and contamination.
A wired connection usually makes the most sense for a permanent vehicle because the signal path is predictable and repairable. Wireless can be useful when a long cable route is impractical, but it doesn't eliminate the need for a reliable power connection, and it adds another possible failure point between the camera and receiver.
Integrating with Your Display System
A working camera is only useful if the driver can see the image quickly and interpret it without leaning forward or searching through menus. The cleanest option is often an existing head unit with a compatible camera input and a dedicated reverse trigger. A standalone monitor works well when the factory radio lacks an input or when the vehicle needs a separate screen.
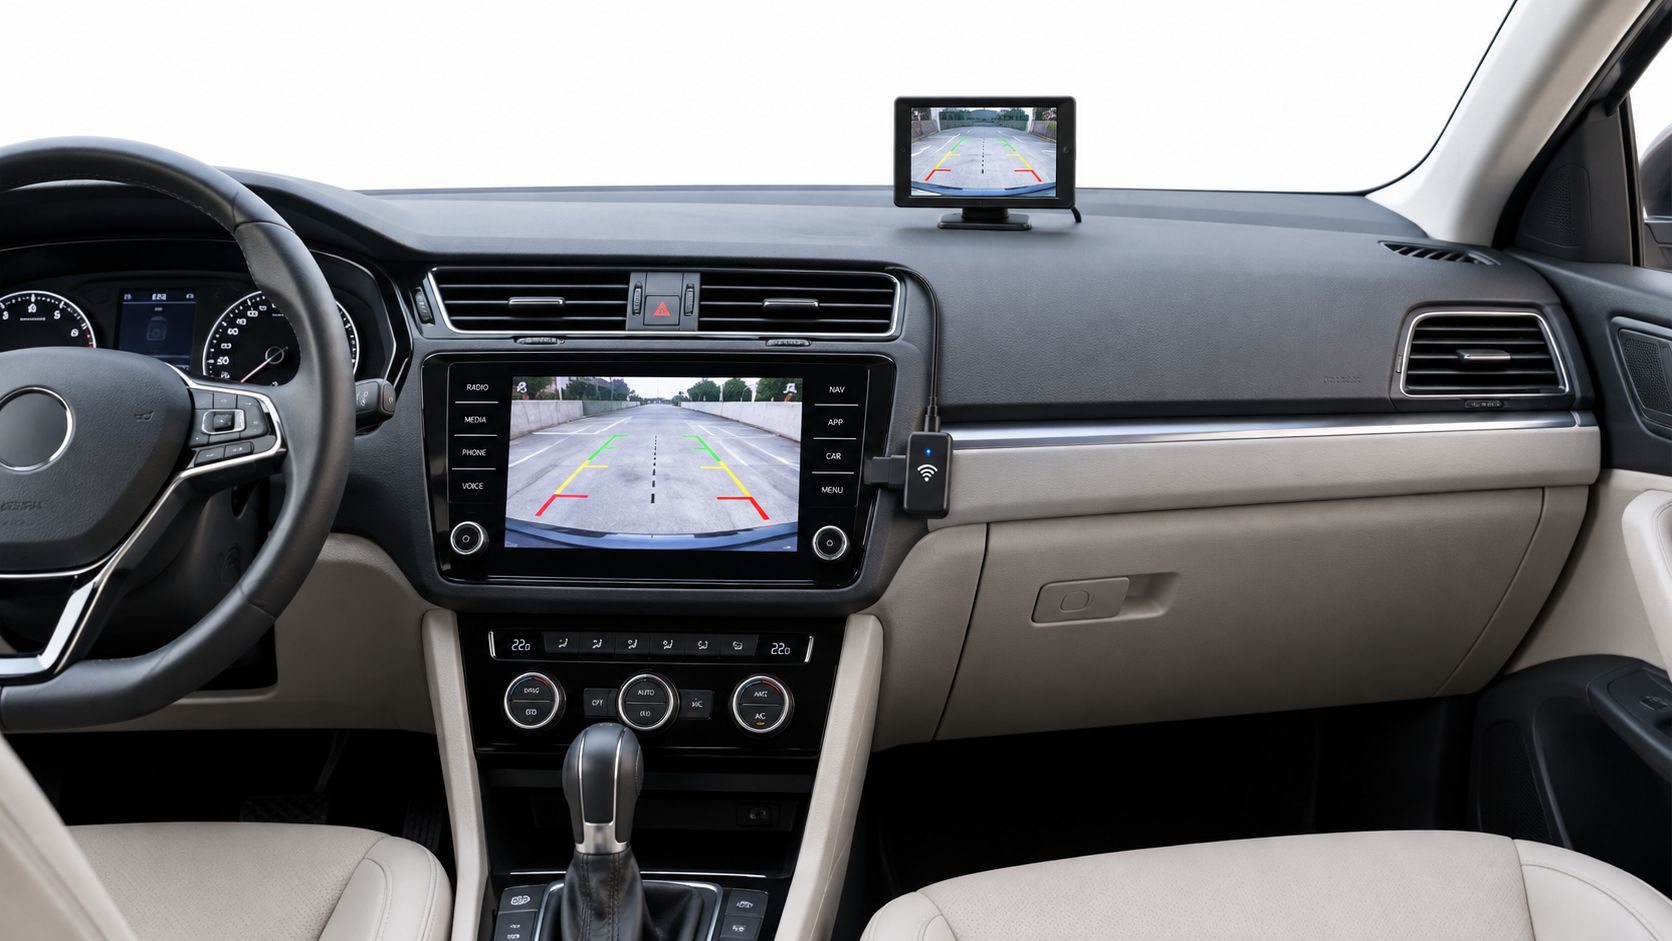
Match the interface to the driver
Factory-style integration can keep the dashboard uncluttered, but compatibility depends on the head unit, vehicle interface, camera format, and reverse signal. An aftermarket receiver may accept a composite camera directly, while a digital camera needs a compatible input or receiver. A wireless CarPlay or Android Auto adapter may improve phone connectivity, but it isn't automatically a substitute for a dedicated camera input.
Position the screen where a quick glance doesn't block the forward view or require the driver to look down for an extended period. The image should appear consistently after selecting Reverse, not only after opening an application or waiting through a connection process. If the system supports parking guidelines, treat them as a visual aid. They don't compensate for an off-center mount or a changed steering angle.
Make maintenance part of integration
The display should be checked alongside the camera, not treated as a separate accessory. Confirm that the picture is bright enough at night, readable in daylight, and free from excessive glare. If the vehicle has a tall rear profile or frequent trailer use, consider whether parking sensors or an additional camera would provide information the plate-level view cannot.
A properly integrated system also needs a clear handoff to the driver. Explain what the guidelines mean, where the camera's blind areas remain, how to clean the lens, and what a delayed or flickering image indicates. That short explanation prevents a driver from treating a blank screen as proof that the area behind the vehicle is clear.
Troubleshooting Common Installation Issues
Start with the symptom, then isolate the system in this order: power, ground, trigger, video, and display configuration. Swapping parts before testing those points often turns a small wiring fault into a full reinstall.
No image or delayed activation
If the screen stays blank, place the vehicle safely in Park and check whether the camera receives power when Reverse is selected. Confirm the ground at the camera, then inspect the reverse trigger at both ends. If the trigger works but the display remains blank, select the correct camera input and test the camera with a known-good compatible monitor.
A delayed image usually points to the display, wireless receiver, or vehicle interface rather than camera pitch. Check whether the head unit is waiting for a reverse signal, cycling through inputs, or negotiating a wireless connection. A direct wired test can help separate a camera fault from a receiver or display problem.
Flicker, dropouts, and poor night vision
Flickering during Reverse commonly comes from a loose ground, weak splice, damaged cable, or a connector that moves with the hatch. Watch the image while flexing the harness near the hinge. If the picture changes, repair that section before replacing the camera.
Poor nighttime visibility can come from a dirty lens, glare from reverse lamps or plate illumination, an overly steep camera angle, or insufficient light at the rear. Clean the lens, inspect reflections, and adjust pitch while keeping the bumper edge and near-ground area visible.
The safety limits are important. IIHS research on camera and sensor effectiveness found that 56 percent of participants using a rearview camera alone struck a stationary object in a separate driver study. Rear parking sensors combined with a rearview camera reduced backing-crash involvement rates by 42 percent, while rear cameras, sensors, and rear automatic braking together were associated with 78 percent lower police-reported backing-crash rates than vehicles with none of those systems.
Those results support a layered approach. Use mirrors and shoulder checks, reverse slowly, keep the lens clean, and add sensors where the vehicle's size or shape creates a persistent blind area.
Audio Jam Inc sells and professionally installs rear-view and backup camera systems for cars, trucks, SUVs, RVs, and fleet vehicles, with attention to display integration, protected wiring, and vehicle-specific visibility. Visit Audio Jam Inc to review camera options and schedule an installation that fits your vehicle.













