

Speaker Adapter Guide: Types, Fit, Wiring and Installation

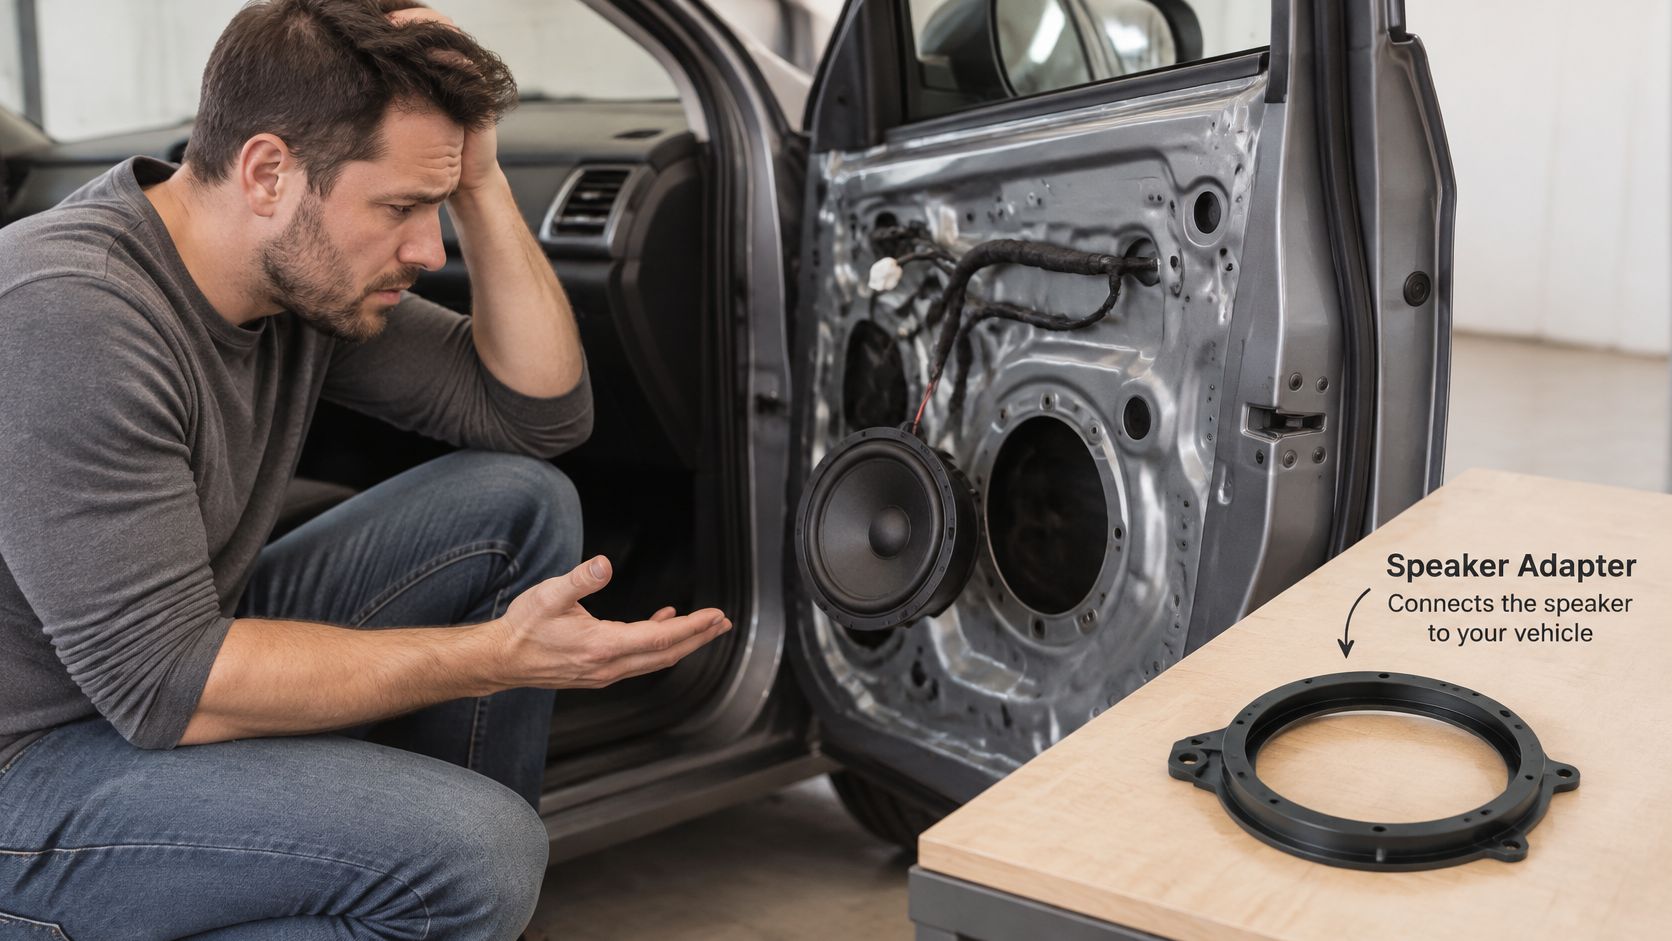
You've removed the door panel, unpacked your new speakers, and discovered that the mounting holes don't line up. Or the speaker screws down, but the trim won't close and the door buzzes whenever the bass hits. Before you blame the speaker, check the part between it and the vehicle: the speaker adapter.
A successful upgrade needs more than a speaker that fits through the hole. It needs a secure mounting surface, the right electrical connection, and compatibility with the factory amplifier and processing.
Table of Contents
- What a Speaker Adapter Does and Its Main Types
- Matching Speaker Size, Depth and Mounting Rings
- Impedance, Wiring Math and Tweeter Adapters
- Checking Compatibility With Your Factory System
- How to Install Speaker Adapters Step by Step
- Fixing Common Speaker Adapter Problems
- Choose Your Adapter and Decide Who Installs It
What a Speaker Adapter Does and Its Main Types
Say your replacement speaker sits loosely inside the factory opening. Tightening the screws harder won't correct the mounting pattern, and packing the gap with soft foam won't provide a stable foundation. You need an adapter designed to connect those particular shapes.
A speaker adapter connects a speaker, wiring harness, or audio interface to a vehicle when the original and replacement parts don't directly match. Think of a travel-plug adapter, with an important catch: a car-audio connection must also respect the amplifier's electrical requirements. It's closer to a translator than a universal plug.
The mounting problem often looks like this.
Speaker adapter types at a glance
| Type | Connects | You need it when | Typical example |
|---|---|---|---|
| Mounting ring | Replacement speaker basket to factory door opening | The replacement has a different mounting footprint or needs spacing | Round speaker bracket for a larger factory opening |
| Wiring harness | Factory vehicle plug to aftermarket speaker leads | You want to avoid cutting the factory connector | Vehicle-specific plug-and-play harness |
| Impedance adapter | Amplifier output to a compatible speaker load | The planned load requires an engineered matching solution | Application-specific impedance-matching interface |
| Tweeter adapter | Component tweeter to dash, pillar, or door position | The tweeter needs a secure mounting location | Tweeter pod or A-pillar mount |
These parts aren't interchangeable. A mounting ring doesn't change impedance, and a harness that clicks into place doesn't prove the replacement speaker is electrically compatible. An impedance interface also isn't a universal cure: its operating range, power handling, and intended application must suit the system.
Vehicle-specific installation hardware developed as interiors became more integrated, reducing the need for improvised cutting and mounting, as described in Jalopnik's history of car-radio fitment.
Identify the mismatch before ordering anything. You may need a ring and harness together, while a processed factory system may require a separate integration solution.
Matching Speaker Size, Depth and Mounting Rings
Measure the vehicle opening, not just the speaker's advertised size. Nominal size describes a product category, not its exact basket diameter, screw pattern, or installed clearance. Use this table as a measuring checklist, not a vehicle-fit guarantee.
Common speaker sizes, openings and adapter needs
| Speaker size | Typical opening | Depth to check | Ring usually needed |
|---|---|---|---|
| 5-1/4 inch | Corresponding round factory opening | Magnet depth against factory unit | Often no if the flange and holes match |
| 6-1/2 inch | Corresponding round opening or larger opening with a bracket | Magnet depth and window-track clearance | Often yes in a larger factory opening |
| 5x7 inch | Corresponding oval factory opening | Basket and magnet depth | Usually no if mounting geometry matches |
| 6x8 inch | Corresponding oval factory opening | Magnet depth and trim clearance | Often no if factory mounting points match |
| 6x9 inch | Corresponding oval factory opening | Magnet depth and trim clearance | Check mounting pattern and depth first |
| 4 inch | Corresponding compact factory opening | Magnet depth and trim clearance | Often yes with proprietary factory mounts |
These labels identify nominal sizes, not measured cutout dimensions. Start with the speaker-size-by-vehicle guide, then confirm the actual opening and replacement speaker drawing.
A product listing can also show whether mounting hardware is included.
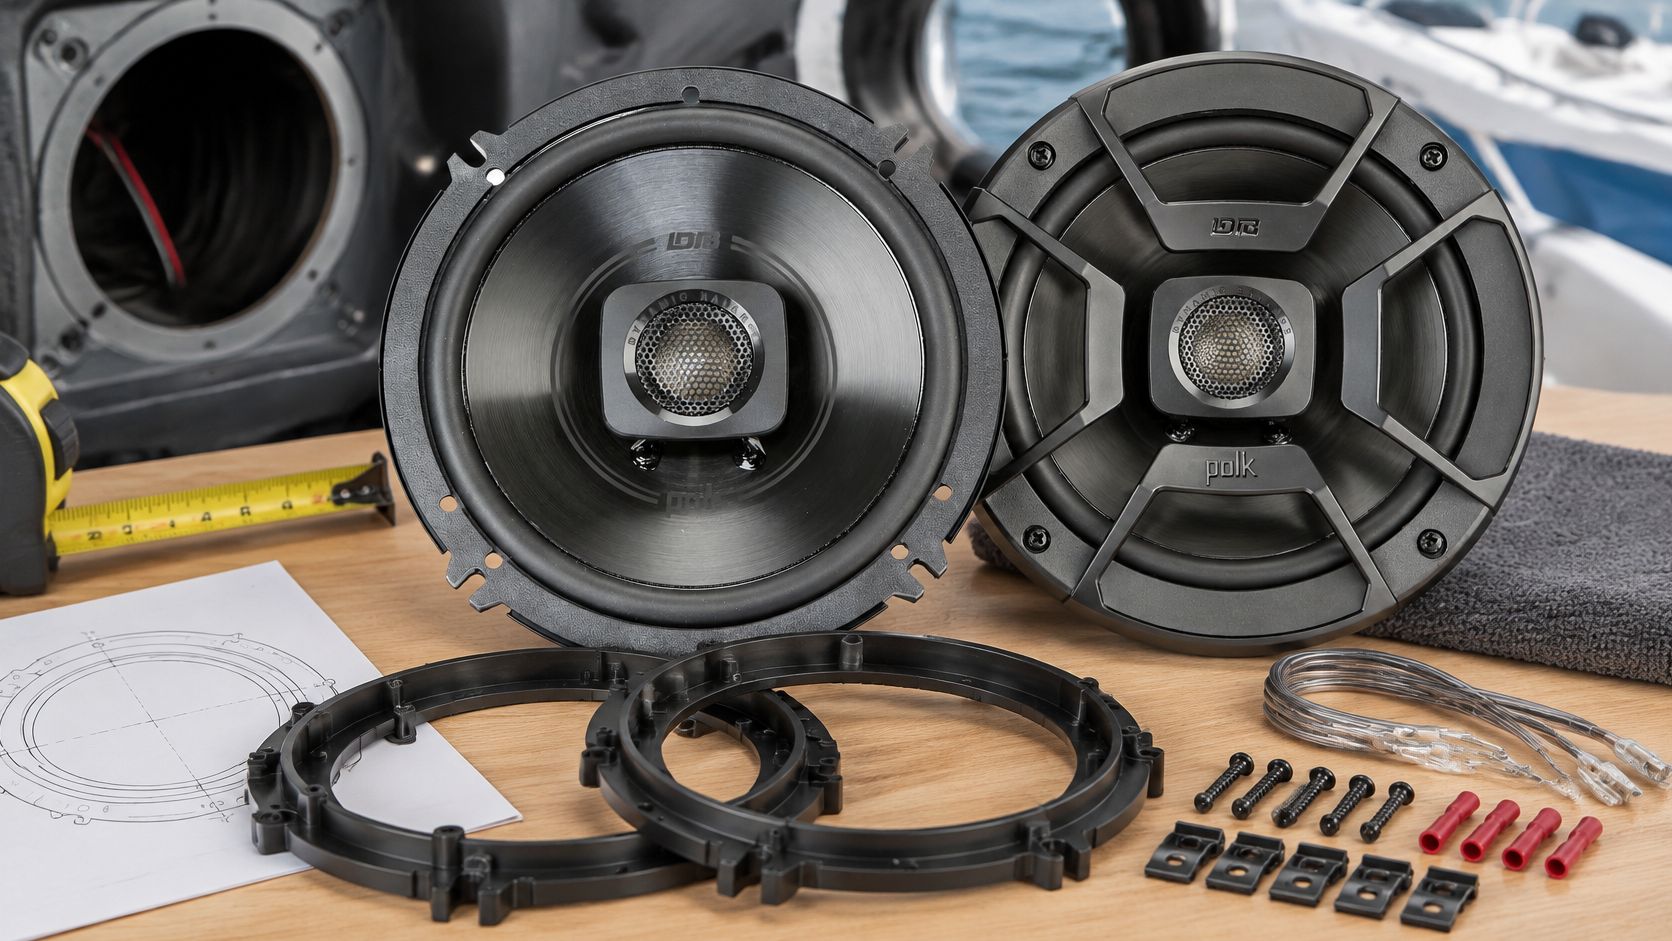
For example, the listing for (2) Polk Audio DB652 6.5” 300 Watt Car Audio Marine/ATV/Motorcycle/Boat Speakers specifies 6-1/2-inch speakers with adapter rings for 6-3/4-inch openings. Included rings still don't establish compatibility with every vehicle using that nominal opening.
Check clearance in both directions
Measure from the mounting surface toward the glass, window mechanism, and structural obstructions. Then check outward toward the trim grille, including space for the surround to move.
A thicker ring moves the magnet away from the glass but pushes the speaker closer to the trim. Check the window through its full travel, and don't assume a stationary window gives you the tightest clearance.
Treat the ring as part of the acoustic mounting
The adapter should provide a rigid, flat, continuous connection. Loudspeaker measurement guidance identifies mounting geometry, baffle depth, diffraction, and obstructed basket openings as factors affecting response and distortion in Measuring the True Acoustical Response of Loudspeakers.
Gaps between the flange, ring, and door let sound leak around the mounting interface, weakening midbass and encouraging rattles. Use a continuous gasket or closed-cell foam seal at both faces without covering basket vents or drainage paths.
Judge the finished installation inside the vehicle. A speaker's behavior on a test baffle won't fully describe its behavior in your door.
Impedance, Wiring Math and Tweeter Adapters
Impedance is the electrical load a speaker presents to an amplifier. As a useful simplification, a lower impedance asks the amplifier to supply more current, rather like opening a valve farther.
Common loudspeaker ratings include 4, 8, and 16 ohms, with automotive systems most often using 4-ohm speakers, according to ePanorama's explanation of impedance and matching. The same explanation describes the IEC nominal-impedance procedure under which an 8-ohm speaker shouldn't fall below 6.4 ohms, and a 4-ohm speaker shouldn't fall below 3.2 ohms.
Those tolerances matter because a speaker's nominal rating isn't a constant resistance across every frequency.
Calculate the complete channel load
For speakers wired in series, add their impedances. For equal-impedance speakers wired in parallel, divide one speaker's impedance by the number of speakers. The following are nominal-load calculations, not permission to combine factory channels.
Wiring setups and resulting load
| Wiring setup | Example | Resulting load | Amplifier check |
|---|---|---|---|
| One speaker on its original channel | One 4-ohm replacement | 4 ohms | Matches a factory 4-ohm nominal load |
| Two speakers in parallel | Two 4-ohm speakers | 2 ohms | Amplifier must support that load |
| Two speakers in series | Two 4-ohm speakers | 8 ohms | Expect reduced available output |
| Two speakers in parallel | Two 8-ohm speakers | 4 ohms | Confirm compatibility with that channel |
| Two speakers in series | Two 2-ohm speakers | 4 ohms | Confirm factory requirements first |
| Single replacement on a lower-impedance factory channel | One 4-ohm speaker replacing a 2-ohm speaker | 4 ohms | May reduce output and alter system balance |
Electrical limit: Never wire a channel below the amplifier's minimum supported load. A higher load is generally less demanding, but it can reduce available power.
Don't add a resistor or buy a generic matching device just to make the printed ratings look alike. Any matching network needs appropriate power handling and can affect efficiency and response.
For another plain-language explanation of the underlying concept, DigiDevice's guide to headphone impedance provides useful context, although headphone examples don't establish car-amplifier compatibility. For vehicle-specific comparisons, use the guide to lower- and higher-impedance car speakers.
Mount tweeters with their crossover requirements intact
A tweeter adapter secures the driver; it doesn't protect it from bass frequencies. Use the intended crossover, match the tweeter to that crossover's specified impedance, and follow the system's polarity instructions.
Mount the crossover away from moisture and moving hardware. Before drilling a pillar or dash, check behind the panel for wiring and airbag deployment paths.
Checking Compatibility With Your Factory System
What powers the speaker: the head unit or a factory amplifier? That question matters more than whether the connector fits. Factory equalization and frequency routing can leave a replacement speaker receiving a signal it wasn't selected to reproduce.
Premium systems deserve particular care. ASM Electronics' component-system buying guide notes that GM Silverado and Sierra Bose systems may use 2-ohm speakers, while many aftermarket amplifiers are designed around 4-ohm loads. Confirm the exact vehicle configuration rather than applying that example to every truck bearing the same badge.
Compare the factory configurations
| Factory setup | Sensible starting point | What not to assume |
|---|---|---|
| Head-unit-powered speakers | Compatible mounting hardware and vehicle harness | Every trim uses the same wiring |
| Separate factory amplifier | Identify its outputs, load requirements, and channel routing | An amplifier automatically requires bypassing |
| Factory DSP or branded processed system | Plan retention or deliberate replacement of processing | A plug adapter restores a full-range signal |
A line-output converter is relevant when adapting a suitable speaker-level signal for an aftermarket amplifier. It isn't automatically needed for a speaker-only replacement, and it doesn't necessarily undo factory equalization. Likewise, bypassing the factory amplifier is a system-design choice, not a required step for every amplified vehicle.
Establish the electrical and signal requirements
Before purchasing, record:
- Signal source: Identify which device drives each replacement location.
- Speaker load: Check the original speaker label and vehicle service information.
- Integration plan: Decide whether you're retaining amplification, adding an interface, or replacing the signal path.
A multimeter offers a rough cross-check, but its DC-resistance reading isn't the same as nominal impedance. Don't assign a replacement rating solely from that reading.
Then choose the speaker layout. Components allow separate tweeter placement but require crossover mounting and more installation work; coaxials consolidate the drivers and simplify placement. Neither approach guarantees better sound on its own.
A higher RMS power-handling rating describes what a speaker can handle, not what the factory amplifier will deliver. Sensitivity, usable amplifier output, and the processed signal all affect the result.
How to Install Speaker Adapters Step by Step
Prepare a plastic trim-tool set, suitable screwdrivers or sockets, gasket material, a flashlight, and the confirmed vehicle-specific harness. Keep the vehicle's service instructions available, especially where door or pillar airbags are involved.
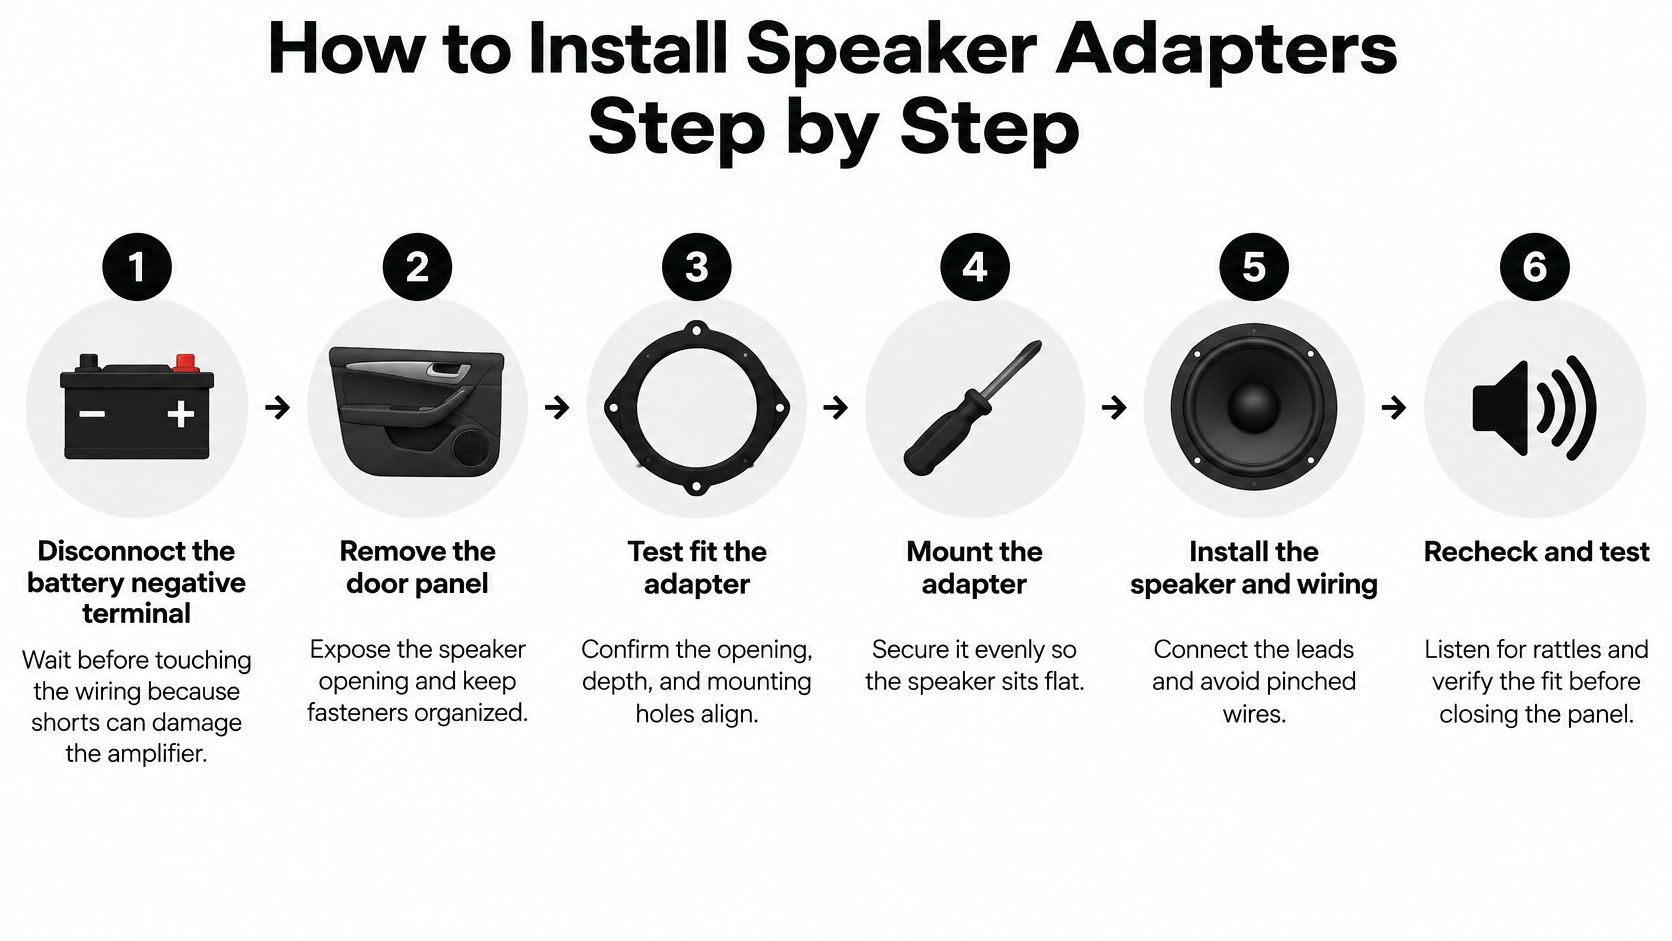
This visual summarizes the physical installation sequence.
Fit and connect without improvising
- Isolate power safely. Follow the vehicle's shutdown procedure, disconnect the battery negative terminal, and observe the specified waiting period before handling wiring. Don't guess at airbag precautions or overlook battery-disconnection requirements.
- Remove the door panel with plastic pry tools, keeping clips and screws organized by location. Pulling against a hidden screw can crack the trim, so stop if the panel resists.
- Verify the original speaker and wiring. Photograph the connector and record the speaker label before removal. The common slip is assuming every wire at the opening carries the same full-range signal.
- Dry-fit the ring and speaker, checking mounting holes, basket clearance, and trim position. Check window travel only with hands and tools clear, using temporary power according to the service procedure, then isolate power again before continuing.
- Seal and secure the mounting interfaces. Apply continuous gasket material and tighten fasteners evenly so the flange sits flat. Overtightening can distort a plastic ring or strip the mounting points.
- Connect the vehicle-specific harness and retain the wire away from glass and moving linkages. Match marked positive and negative terminals using the wiring diagram, not vehicle-wire color alone; a red aftermarket lead is positive only when its documentation identifies it that way.
- Confirm the channel load before powering up. Keep the intended wiring topology unless the amplifier and crossover design support a change. Redline Car Garage's speaker-wiring guide explains why mechanically compatible replacements still require an electrical-load check.
- Reconnect power safely and test at low volume with the trim removed. Play a mono signal, use balance and fade to identify each location, and investigate unexpected tonal changes before increasing volume.
- Reassemble and listen with the doors closed. Confirm that clips, connectors, and weather barriers are restored, then increase volume gradually. Don't use extreme playback levels to test an installation that already sounds distressed.
Polarity warning: A speaker can play while connected with reversed polarity. Thin bass when paired speakers play together warrants checking their marked connections, not simply increasing bass boost.
For broader panel-removal and speaker-fitting guidance, consult the car-speaker installation guide.
The following video is an additional visual reference.
Fixing Common Speaker Adapter Problems
Rattles, weak bass, and amplifier cutout point toward different faults. Start with the symptom rather than replacing parts at random.
Speaker adapter symptoms, causes and first fixes
| Symptom | Likely cause | First fix |
|---|---|---|
| Rattle changes when the ring is pressed | Loose ring or mounting gap | Reseal and tighten evenly |
| Thin sound, weak bass | Reversed polarity on one speaker | Verify terminal markings and correct the reversed connection |
| Weak midbass | Acoustic leakage around the mount | Inspect ring rigidity and continuous sealing |
| Speaker cuts out or amplifier protects | Unsupported load, short, or wiring fault | Shut down and inspect wiring and load |
| Missing highs or lows after installation | Incorrect signal routing or bypassed processing | Verify crossover routing and integration |
| Trim won't close | Excessive ring thickness or speaker depth | Reassess inward and outward clearance |
| Crackle when the harness moves | Loose or corroded connection | Reseat, recrimp, or replace the connector |
Isolate the fault before changing hardware
Start with low-volume playback and identify the affected location using balance and fade. Turn the system off before disconnecting a speaker or changing a connection, then retest the remaining branch if the wiring arrangement permits.
A known-good, electrically compatible speaker can help distinguish a failed driver from a wiring or signal problem. Check the amplifier's protection indicator or mute state, but don't repeatedly restart a system that immediately shuts down.
For a mounting rattle, gently press the ring or fixed flange, keeping fingers away from the cone and surround. A change in noise points toward mounting movement or contact, although nearby trim can also vibrate.
Separate acoustic problems from signal problems
If the mounting is secure but midbass remains weak, inspect the seal and compare paired-speaker operation with each speaker playing alone. Correct confirmed polarity errors rather than swapping leads blindly.
Missing frequency ranges need a different approach. Verify that the replacement is connected to the intended channel and crossover output before blaming the driver; a factory tweeter feed won't become full-range because you attach a larger speaker.
Simple connection corrections may be manageable during the same work session. Replacement hardware or vehicle-specific integration can require sourcing parts, so don't promise yourself a fixed completion time.
If the amplifier enters protection after a wiring change, turn it off and verify the load and connections before trying again.
Choose Your Adapter and Decide Who Installs It
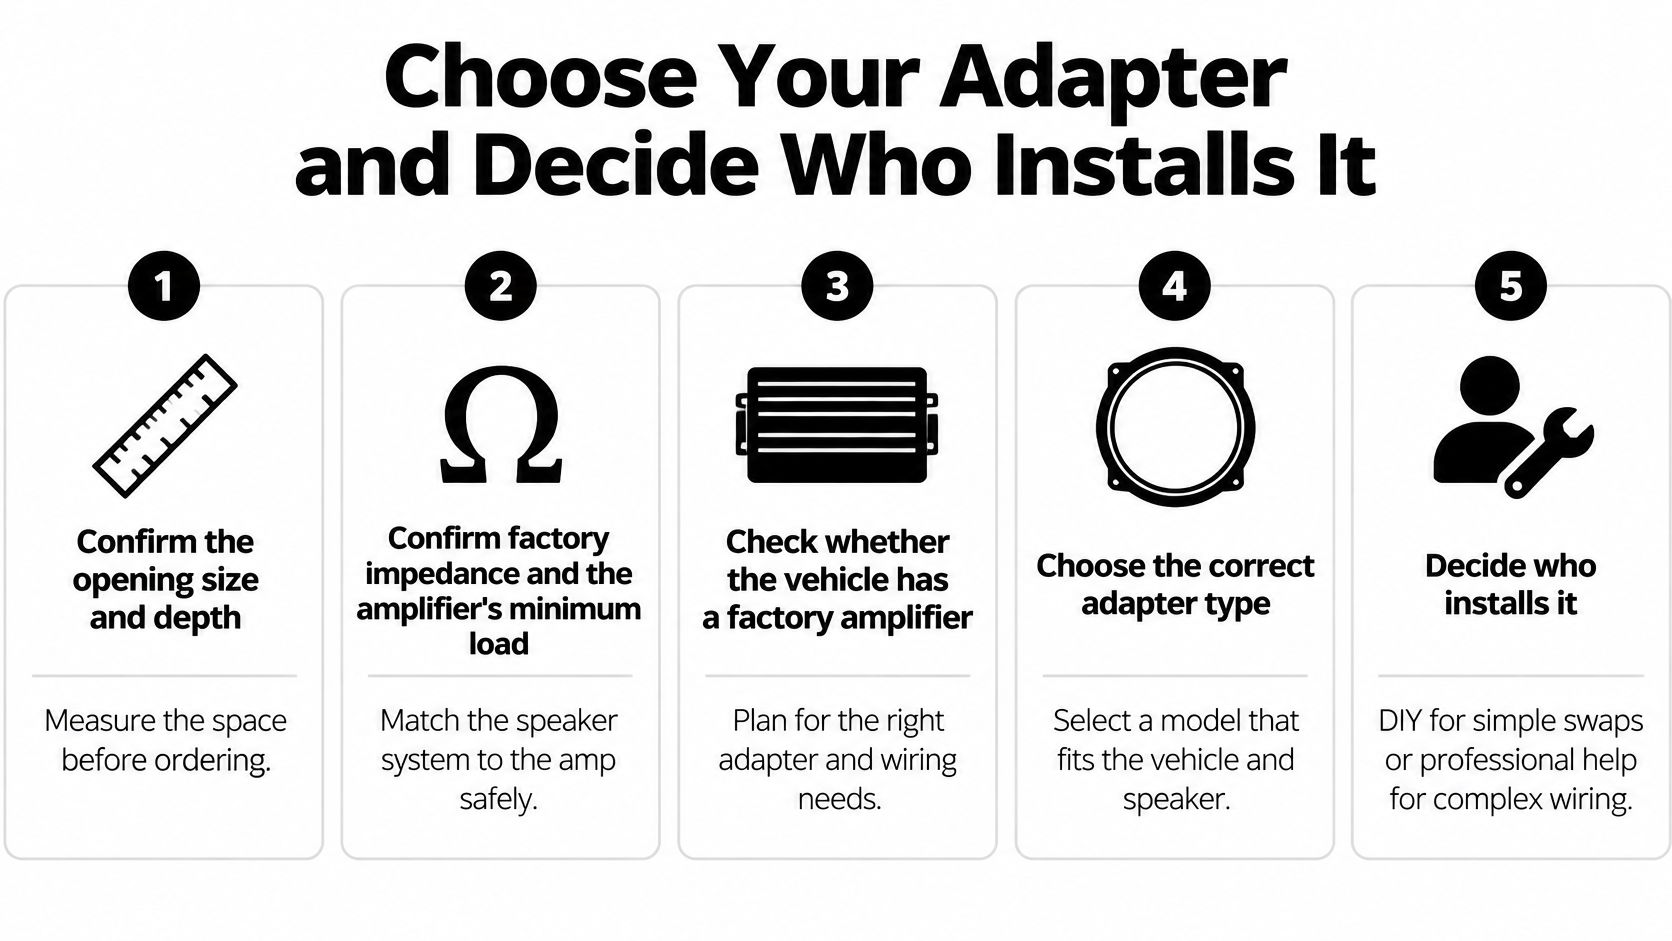
Before ordering, build a short fitment record rather than relying on a product photo. Record the exact vehicle trim and audio package alongside your measurements.
- Opening and clearance: Note the cutout, mounting pattern, inward depth, and space behind the trim.
- Electrical compatibility: Confirm factory speaker impedance and the amplifier's supported load.
- Factory integration: Identify external amplification, DSP, and channel-specific frequency routing.
- Harness identification: Match the connector to the year, make, model, trim, and audio package.
- Mounting supplies: Select a rigid ring, suitable fasteners, continuous gasket material, and wire retention.
- System pairing: Check speaker power handling alongside amplifier output and sensitivity, not peak-power advertising.
- Verification plan: Keep terminal markings, wiring information, and clearance checks accessible during installation.
This checklist helps separate a straightforward replacement from a system-integration job.
Choose DIY for a confirmed swap
DIY makes sense when the speaker location is accessible, the mounting kit is documented, and the factory signal and load are understood. You should be able to complete the job without cutting structural parts or guessing at wire functions.
Book professional installation when the job involves uncertain impedance, complex factory processing, amplifier replacement, or custom tweeter mounting near airbags. Cutting or modifying panels also deserves a deliberate plan before any irreversible work.
We offer local installation services, and customers can schedule an appointment with Audio Jam. Bring your vehicle's trim and factory audio-package details so the installation discussion starts with the system you have.
Audio Jam Inc offers local installation services for car-audio upgrades, including jobs where speaker fit and factory-system integration need careful planning. Confirm your trim and factory audio system, then visit Audio Jam Inc to schedule an appointment and discuss the right adapter approach for your vehicle.