


How to Add Bluetooth to Car with Four Retrofit Methods

You're sitting in an older car, phone in hand, trying to start a call or play a podcast through a radio that was designed before wireless audio became expected. The usual choices seem simple, but the installation details aren't. A cheap FM transmitter can work in minutes, while an integrated adapter or new head unit can deliver much better sound, but only if the vehicle's wiring, radio, and controls support it.
The right answer depends on what you want to preserve. Some drivers need basic hands-free calling without removing the dashboard. Others want factory-looking integration, steering-wheel controls, navigation, and dependable media playback. This guide explains how to add Bluetooth to a car through four practical retrofit methods, including the hidden trim, harness, grounding, and compatibility problems that generic setup guides often skip.
Table of Contents
- Evaluating Bluetooth Retrofit Methods
- Installing AUX Bluetooth Adapters
- Setting Up FM Transmitters
- Upgrading to a Bluetooth Head Unit
- Integrating Factory Radios with Bluetooth Modules
- Troubleshooting Installation Issues
- Deciding Between DIY and Professional Installation
Evaluating Bluetooth Retrofit Methods
Bluetooth is no longer an unusual automotive feature. The Bluetooth SIG reported that 86% of new cars shipped worldwide in 2018 included Bluetooth connectivity, which helps explain why drivers now expect wireless calling and audio as baseline functions. You can read the Bluetooth SIG automotive market update for the original industry data.
Older vehicles need a different decision process. Start by checking whether the factory radio has an AUX input, a CD-changer interface, or a vehicle-specific integration option. If it has none of those, an FM transmitter avoids disassembly, but it also introduces another audio signal path that can pick up interference. A replacement head unit offers the broadest feature set, yet it changes the dashboard and may require modules for factory amplifiers, steering-wheel controls, warning chimes, or backup cameras.
Practical rule: Choose the least invasive method that meets your call quality and audio expectations. More hardware doesn't automatically mean a better retrofit if the vehicle's interface isn't compatible.
| Method | Estimated Cost | Installation Time | Skill Level | Compatibility |
|---|---|---|---|---|
| AUX Bluetooth adapter | Low to moderate, depending on the adapter and vehicle interface | Usually a trim-removal and wiring job | Basic to intermediate | Requires AUX, a compatible CD-changer port, or a vehicle-specific adapter |
| FM transmitter | Low | Minutes, with optional microphone cable routing | Beginner | Works with virtually any functioning FM radio and 12V power outlet |
| Bluetooth head unit | Moderate to high, depending on the receiver and integration parts | Several hours for a careful DIY installation | Intermediate to advanced | Depends on dash fitment, wiring, factory amplifier, controls, and vehicle electronics |
| Factory-integration module | Moderate, with vehicle-specific parts affecting the final cost | Often measured in hours | Intermediate | Limited to vehicles with a supported radio and connector system |
The first Bluetooth hands-free car kits appeared in 2001, according to the Bluetooth SIG history of Bluetooth. By early 2005, fewer than 10 car models had Bluetooth, while a trade article reported that more than 40 models offered it by late 2005. That rapid transition is why older cars vary so widely. Two vehicles that look similar may use entirely different radio ports, amplifier paths, or control modules.
For most owners, an AUX integration adapter is the best balance when the stock radio works well and the car has a usable audio input. An FM transmitter wins on speed and reversibility. A head unit makes sense when you also want a modern display and smartphone integration. A factory module is worth investigating when preserving the original dashboard and controls matters more than universal flexibility.
Installing AUX Bluetooth Adapters
An AUX adapter is usually the cleanest retrofit for an older factory radio that already accepts an external audio source. The Crutchfield guide to Bluetooth in-car installation describes this factory-radio and AUX route as a practical way to preserve the original head unit while adding streaming and calling.
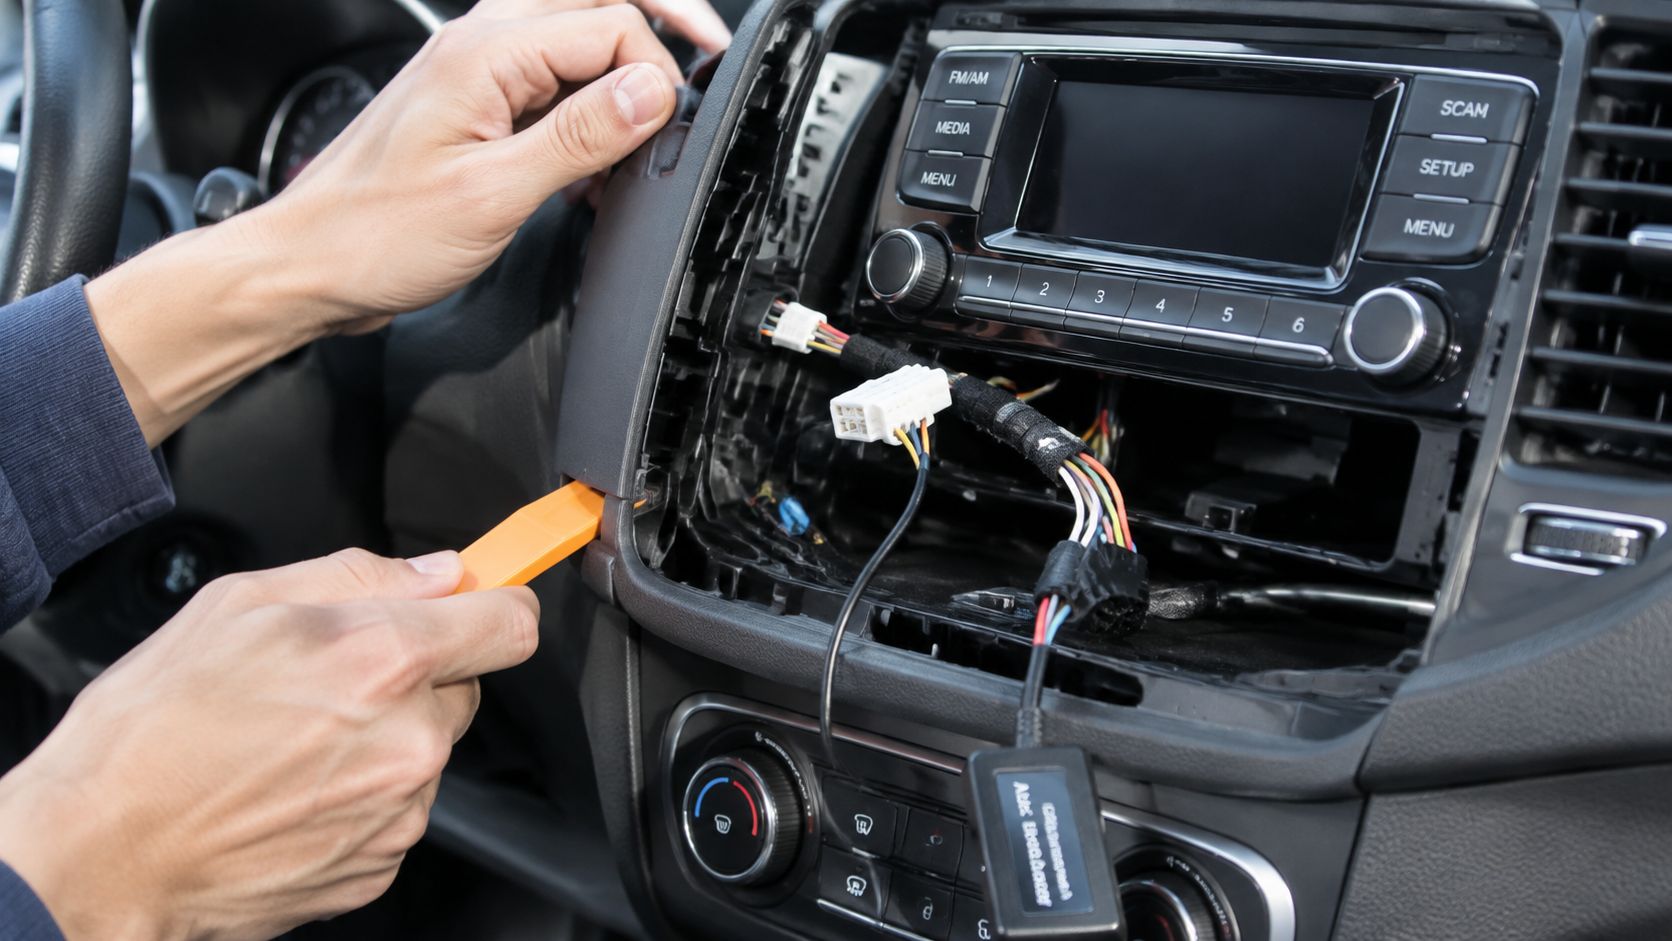
Prepare the parts before removing trim
Have the following ready:
- Plastic pry tools: Use automotive panel tools instead of metal screwdrivers, which can scratch trim and mark soft plastics.
- Vehicle-specific adapter: Confirm the exact make, model, year, factory radio, and any premium audio option before ordering.
- Bluetooth receiver with microphone: A receiver designed for hands-free calling should include a dedicated mic and control method.
- Loop isolator: Keep one available if the AUX path produces an engine-speed whine or buzzing noise.
- Screwdrivers and socket tools: Factory radios often use a mixture of screws and retaining bolts.
- Cable ties and cloth tape: Secure the adapter and prevent wires from rattling behind the dash.
- Trim removal information: Identify hidden screws and clip locations before pulling on a bezel.
Disconnect the battery if the vehicle-specific instructions require it, especially when removing a radio connected to sensitive vehicle electronics. Don't guess about this step. Some cars can log faults or lose settings when connectors are disturbed without the correct procedure.
Connect the adapter carefully
Remove the trim bezel with steady pressure, working around the panel rather than forcing one corner. Once the radio is accessible, remove its fasteners and pull it forward only far enough to identify the rear connectors. Many adapters connect through a dedicated CD-changer or accessory port rather than a simple headphone-style AUX socket, so the plug must match the radio's actual interface.
Connect the Bluetooth adapter to the correct port, then route the microphone toward the upper steering-column area or headliner. The microphone should face the driver and stay clear of vents, moving trim, and airbag deployment zones. Hide the cable under the edge of the dash or headliner only where it can't be pinched during reassembly.
A clean install is mostly cable management. A receiver that works electrically can still sound poor or rattle if the microphone, harness, or adapter body hangs loose behind the radio.
Select the AUX source and test both music and a phone call before reinstalling every panel. Check left and right audio, microphone pickup, call controls, and whether the phone reconnects after the ignition cycles. If the speakers produce a high-pitched whine that rises with engine speed, inspect the grounds and place a loop isolator in the AUX signal path. Don't bury the problem behind the trim and hope it disappears.
Setting Up FM Transmitters
An FM transmitter is the fastest way to add Bluetooth when you don't want to remove the radio. The unit draws power from the vehicle's 12V outlet, receives audio from your phone, and broadcasts that audio over a selected FM frequency. It's reversible, accessible, and compatible with almost any car that has a working radio and power socket.
The compromise is signal quality. Busy urban areas can leave fewer clean frequencies available, and nearby stations or electrical noise can introduce hiss, static, or interruptions. An FM transmitter is useful for basic streaming and calls, but it won't match a wired AUX connection or a properly integrated module for consistency.
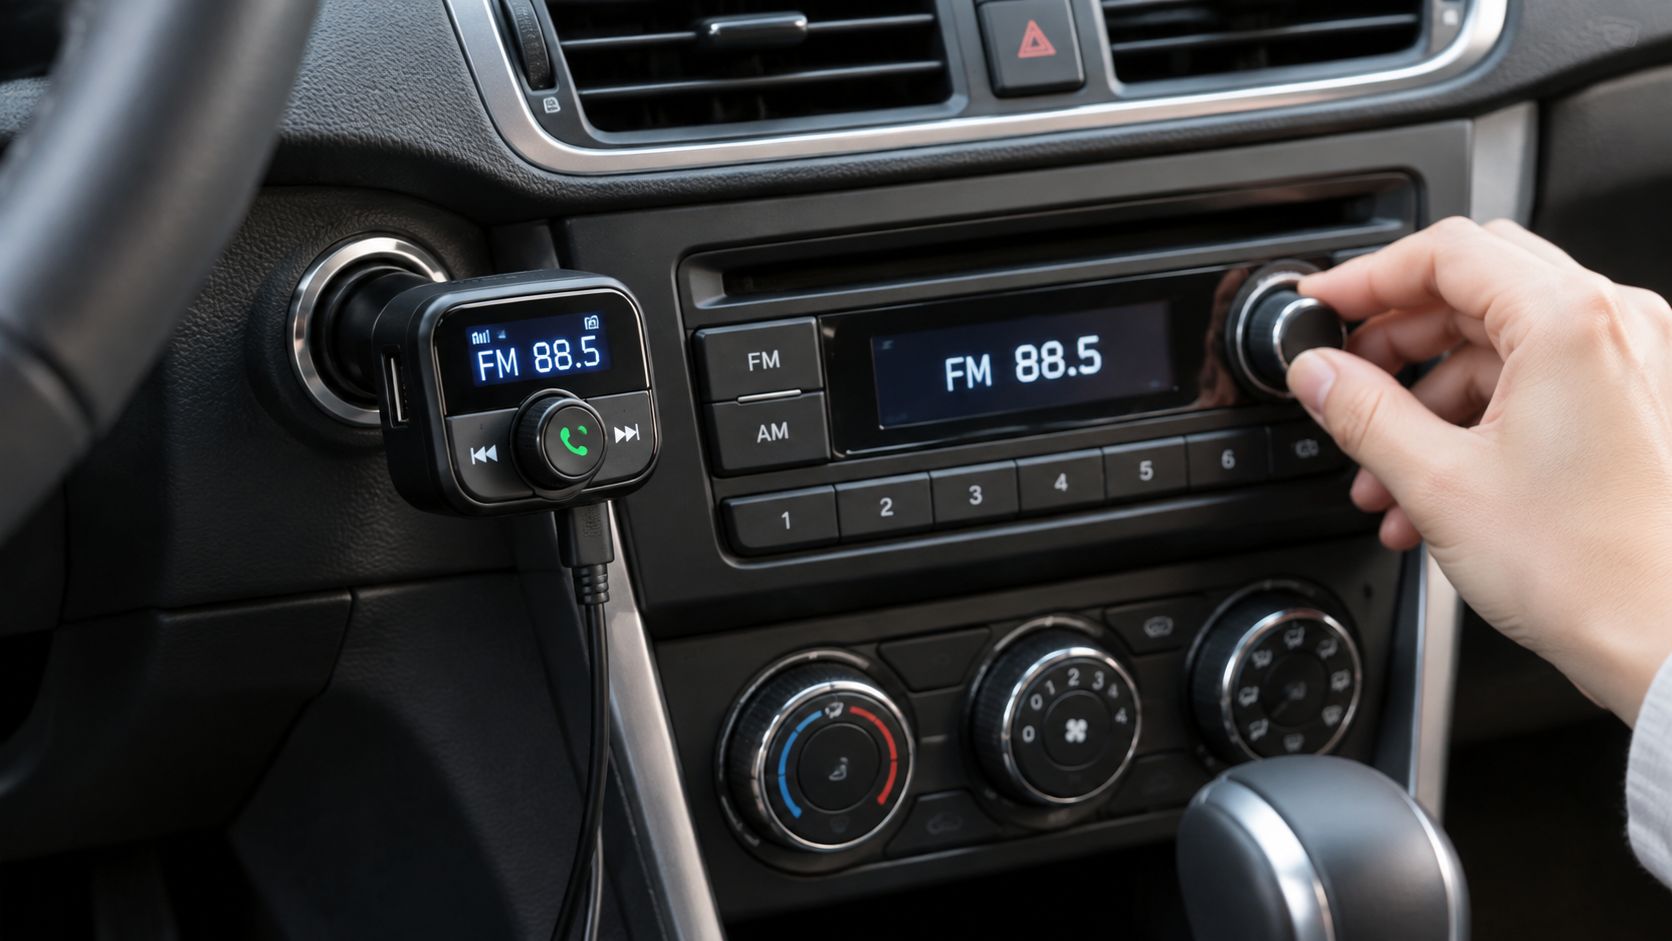
Find a workable frequency
Turn off the transmitter and scan the local FM band. Look for a frequency with no station activity, weak background audio, or nearby interference. Set the car radio and transmitter to the same unused frequency, then save it as a preset if the radio allows that.
Avoid placing the transmitter where the power plug loses contact over bumps. A loose connection can make the unit reset, which sounds like a Bluetooth failure even though the issue is power. Keep the controls visible enough to change the frequency safely while parked, but don't mount the unit where it obstructs the driver's view.
Pair and route the microphone
Put the transmitter into pairing mode, enable Bluetooth on the phone, and select the transmitter from the available device list. Complete the call test before hiding the microphone cable. If the built-in mic doesn't pick up your voice clearly, route an included external microphone along the dash edge and up the A-pillar, keeping it away from curtain airbags and moving trim.
Lower the phone's media volume if the signal sounds distorted, then adjust the radio volume for listening level. If the sound is thin or noisy, test another FM frequency before replacing the transmitter. Keep the phone close enough for a reliable Bluetooth connection, and remove old paired devices if the unit struggles to reconnect.
FM is the sensible choice for a temporary vehicle, a rental, or a car where dashboard removal carries too much risk. If you stream daily, make frequent calls, or care about clean audio, use it as a stopgap rather than treating it as equivalent to a wired integration.
Upgrading to a Bluetooth Head Unit
A modern Bluetooth head unit changes more than the radio. It can add hands-free calling, wireless or wired audio, a touchscreen, navigation access, and compatibility with Apple CarPlay or Android Auto, depending on the receiver. It also creates the largest installation workload because the radio is tied to the dashboard, speakers, power circuits, and sometimes factory data networks.
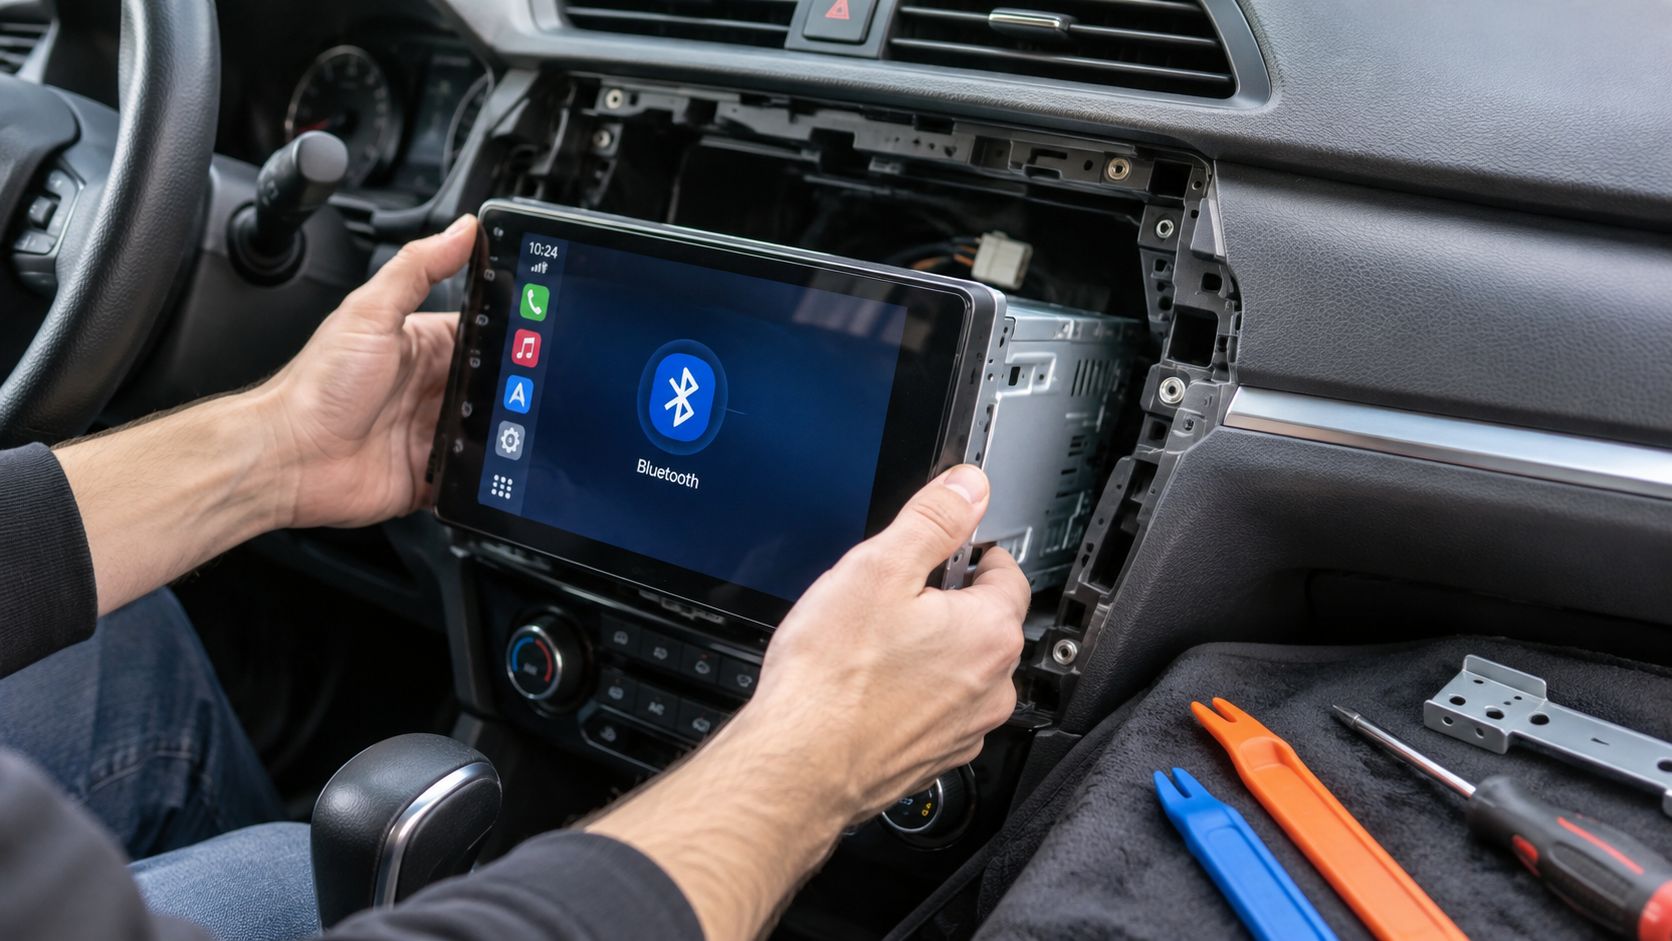
Before buying, verify the vehicle fitment rather than relying on a product photograph. Check the dash opening, mounting brackets, wiring harness, antenna adapter, steering-wheel-control interface, factory amplifier requirements, and backup-camera connections. A receiver can physically fit while still failing to operate the car's chimes, amplifier, or steering-wheel buttons without the correct integration hardware.
Remove the factory radio without creating new faults
Use plastic pry tools, a socket set, screwdrivers, a flashlight, and cloth tape. Study the trim sequence first, then remove panels in the order specified for the vehicle. Keep screws with the panel they came from, and don't pull a bezel before checking for hidden fasteners or attached connectors.
If battery disconnection is required, follow the vehicle and radio instructions. After the radio comes out, photograph the original connector arrangement before unplugging anything. That picture is useful when several similar plugs are present or when the factory system includes a separate amplifier and data connector.
Build the harness on the bench
Match the aftermarket receiver harness to the vehicle-specific harness before placing the new radio in the dash. A plug-and-play harness is preferable because it limits wire cutting, but it still needs careful inspection. Confirm constant power, switched power, ground, speaker outputs, illumination, antenna control, amplifier turn-on, and any data-interface connections against the receiver and vehicle documentation.
A wrong speaker or power connection can create silence, noise, blown fuses, or a system that drains the battery. Don't assume matching wire colors are universal. Use the wiring diagram for the exact vehicle and receiver, and label anything that isn't obvious.
Test before final assembly
Connect the receiver loosely and test power, Bluetooth pairing, every speaker, the microphone, steering-wheel controls, USB, backup camera, and any factory amplifier. Pair the phone while the dash is still open. This is the easiest point to find a missing ground, incorrect adapter, or microphone connector that was never fully seated.
The documented installation time for a basic OEM Bluetooth retrofit is often about 1.5 to 2 hours, largely because trim and wiring access take time, as shown in this manufacturer retrofit guide. A head unit can require a similarly careful process, with additional setup for brackets, harnesses, controls, and display features. Route the microphone and USB cable securely, then reinstall trim only after the system passes its complete test.
Integrating Factory Radios with Bluetooth Modules
A factory-integration module is designed for owners who like the original radio and don't want a touchscreen replacement. The module connects to a supported radio or vehicle harness, then adds Bluetooth calling and audio while retaining the factory display and, in some vehicles, existing steering-wheel controls.
Compatibility is the deciding factor. Vehicle-specific modules aren't universal, even when two cars share a body style or model name. Confirm the radio part number, connector layout, factory amplifier arrangement, and supported phone functions before ordering. Some systems may support calling but not full music streaming, while others require a particular input or software configuration.
Confirm the vehicle interface
Start with the factory radio documentation and the module's fitment chart. Look for restrictions involving production changes, premium audio, navigation radios, satellite systems, or factory USB hardware. If the module requires a CD-changer port, that port must be present and enabled. If it uses an AUX input, verify that the radio can select that source after installation.
The installation usually begins with battery precautions and trim removal. Pull the radio forward, connect the module to the specified harness or port, and secure the module so it can't contact the radio chassis or rattle against the dash. Don't leave the adapter suspended from its cable.
Route the microphone like an original component
Place the microphone near the driver, typically at the upper steering-column area or near the headliner, where it has a clear path to the cabin. Keep the cable away from airbag paths, sharp brackets, heater ducts, and hinges. Use cloth tape or ties to stop movement, but leave enough slack for service access.
After reconnecting the radio, select the new source and pair the phone. Test incoming and outgoing calls, voice pickup, media playback, track controls, and reconnection after the vehicle is restarted. If steering-wheel buttons are supported, program them only after the module communicates correctly with the radio. Adding multiple variables at once makes diagnosis harder.
Preserving the factory radio preserves the factory appearance, not necessarily every original function. Confirm exactly which controls and sources the module supports before treating it as a complete replacement for a modern head unit.
A factory module suits a car with a good original display, a clean dashboard design, and a supported integration path. It's less suitable when the radio has failing buttons, poor screen visibility, limited audio inputs, or no compatible interface. In those cases, a new receiver may solve more problems in one installation.
Troubleshooting Installation Issues
Bluetooth problems often come from the installation around the module, not from pairing alone. Manufacturer pairing instructions generally focus on permissions, discoverability, and connection steps, while real vehicles can also suffer from outdated firmware, incompatible Bluetooth implementations, failed phonebook synchronization, or poor microphone grounding. Use the Chevrolet Bluetooth pairing instructions as a reference for the basic pairing sequence, then work through the hardware checks below.
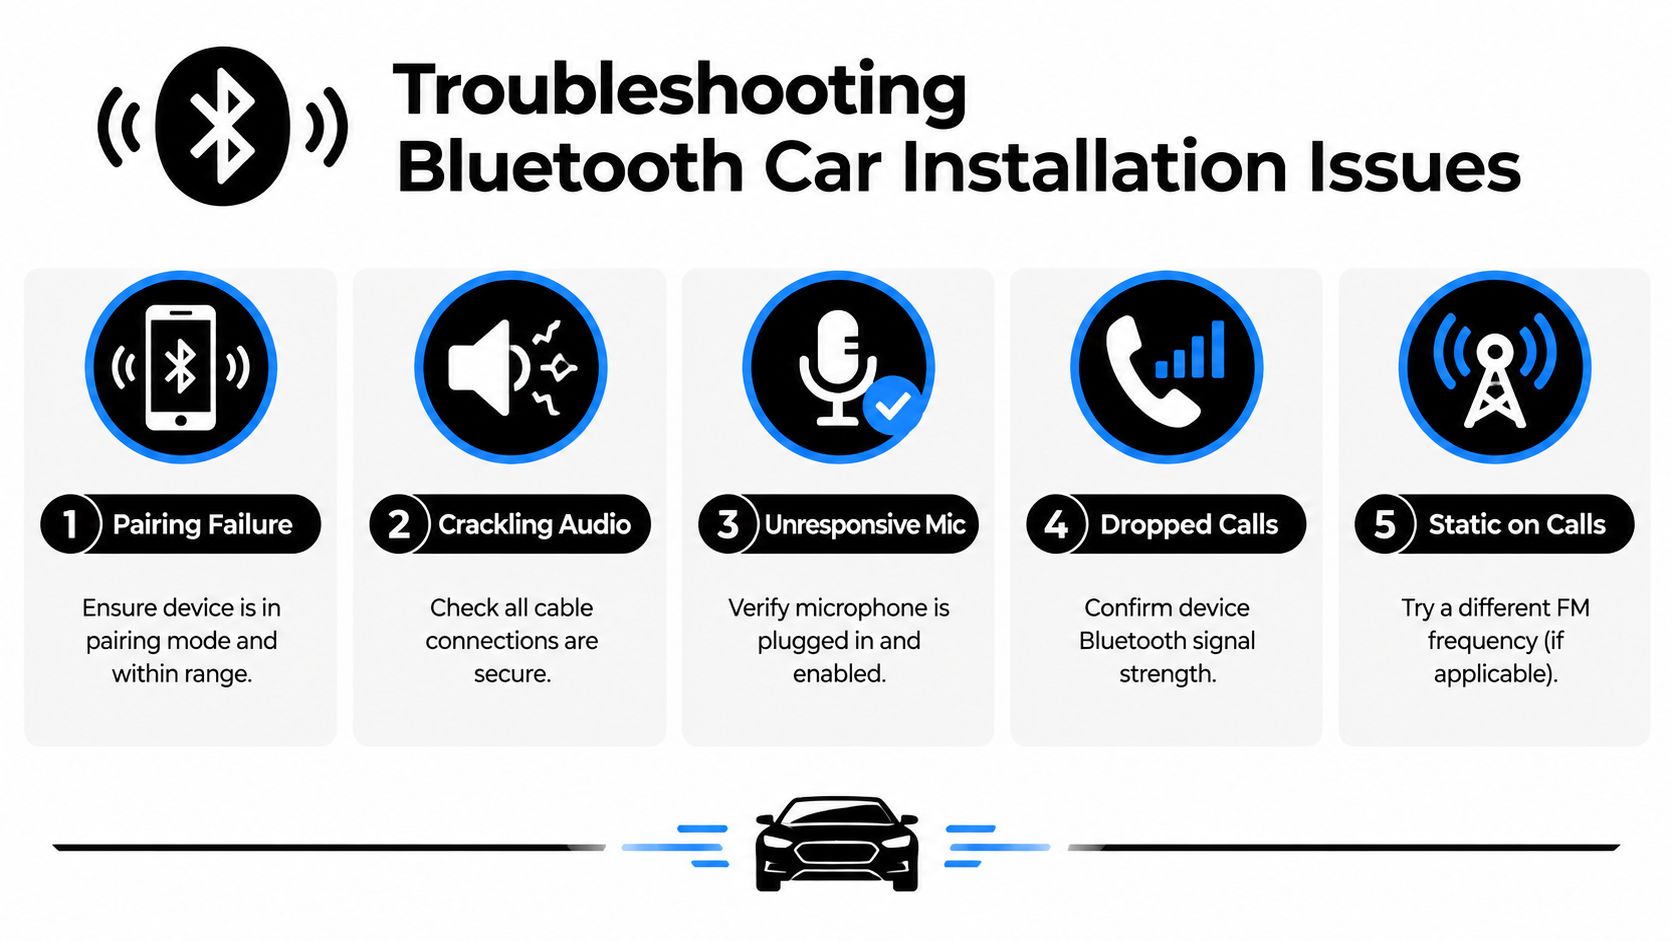
- Pairing failure: Put the phone and module into their actual pairing modes, remove old saved connections, and keep the phone close during setup. If the module never appears, confirm it has power and that its reset procedure has been completed.
- Dropped connections: Test with another phone, then inspect module firmware, connector seating, and Bluetooth compatibility. If only one phone disconnects, clear its saved vehicle connection and pair it again.
- Crackling or whining audio: Check the AUX plug, harness ground, and adapter mounting. Engine-speed noise commonly points to a grounding imbalance, so test a loop isolator in the AUX path before replacing the receiver.
- Unresponsive microphone: Confirm that the mic plug is fully inserted, the module supports hands-free calling, and the cable isn't pinched behind trim. Move the mic away from vents and reflective hard surfaces if callers hear excessive cabin noise.
- Static from an FM transmitter: Choose another unused frequency, verify the transmitter and radio match exactly, and make sure the 12V plug stays firmly powered.
Don't reinstall the dashboard until every symptom has a known cause. A ten-minute test with the trim removed is far easier than another complete teardown.
Deciding Between DIY and Professional Installation
DIY works well when the vehicle has a straightforward AUX connection, accessible trim, and a documented harness. It becomes a poor bargain when the car has a factory amplifier, data-controlled radio, fiber-optic audio, difficult trim, or safety systems tied into the original display. One damaged clip or unresolved electrical fault can erase the time saved by avoiding professional labor.
A shop also makes sense when you need the new Bluetooth system to work with steering-wheel controls, backup cameras, factory chimes, USB ports, or an advanced amplifier. Professional installers can identify the correct vehicle-specific interface before the dash comes apart, route microphones away from airbags, and test the system under operating conditions. Ask what parts they'll use, whether the work includes trim and wiring protection, and what warranty applies to installation-related faults.
Audio Jam Inc offers Bluetooth devices, hands-free kits, and Apple CarPlay head unit installations with built-in Bluetooth and USB connectivity. For drivers who want a clean retrofit without sorting out vehicle-specific wiring alone, visit Audio Jam Inc to review compatible options or arrange an installation.













