


How Long Does It Take to Install Remote Start Explained

A straightforward professional remote start install is usually about 3 hours, while a more complex vehicle with immobilizer integration or added features can take a full day. If you're standing in a cold driveway wondering whether this is a quick errand or an all-day appointment, the honest answer is that the car matters as much as the remote start itself.
If you're asking this question when winter is closing in, you're likely trying to plan around work, school pickup, or a day off. You want to know if you can wait at the shop, drop the car off, or reschedule for another day. That's a smart question, because remote start isn't like swapping floor mats or bolting on a simple accessory.
The part that confuses first-time customers is this: the box on the shelf may look the same from one vehicle to the next, but the installation is really an integration job. One car gives the installer open access, simple wiring, and easy programming. Another hides everything deep in the dash, has tighter factory security, and needs extra module setup before the engine will start safely.
Adding a smart switch to a house is a helpful comparison. The switch itself may be small. The time comes from opening the wall, identifying the right wires, connecting it correctly, and making sure nothing else in the system stops working. A remote start works the same way in a car.
That's why two customers can buy a similar remote start setup and have very different appointment lengths. One is back on the road the same morning. The other gets a call later in the day saying the vehicle needed extra programming and testing.
Table of Contents
- Introduction How Long Remote Start Installation Really Takes
- Understanding What Remote Start Installation Involves
- Professional vs DIY Installation Time Compared
- Key Factors That Affect How Long Installation Takes
- What to Expect During Your Installation Appointment
- Tips to Schedule and Speed Up Your Remote Start Install
- Planning Your Remote Start Installation With Confidence
Introduction How Long Remote Start Installation Really Takes
You book a remote start before the first hard freeze because mornings are about to get busy. Work starts early, school drop-off is tight, and you want to know one practical thing before handing over the keys. Is this a quick wait-at-the-shop job, or is your car staying for the day?
The honest answer is that remote start installation is usually a vehicle integration job, not a fixed product install. The same remote start system might take only a few hours on one vehicle and much longer on another because the installer has to connect it to that specific car's wiring, security system, and programming.
That catches first-time customers off guard.
The remote start box may look the same on the counter, but the labor behind it can change a lot from vehicle to vehicle. An older model with simpler wiring can be more direct to access and set up. A newer vehicle with push-button start, factory anti-theft features, or extra modules can require more disassembly, more wire checking, and more programming before it will start and shut down the right way.
A house wiring comparison helps here. Installing a new switch is not just about the switch itself. The time comes from opening the wall, finding the right wires, making safe connections, and testing everything before you close it back up. Remote start works the same way inside a dash.
Why the same product can take very different amounts of time
What changes the schedule is usually the car, not the remote start brand. Some vehicles give the technician clear access to ignition and starter circuits. Others hide key connections deeper in the dash or require the installer to sync a bypass or data module so the factory security system allows remote starting.
Practical rule: Ask about install time by vehicle year, make, model, trim, and key type, not by remote start brand alone.
That one detail clears up a lot of confusion. You are not really timing how fast a box gets installed. You are timing how long it takes to integrate that box into your vehicle without creating problems later.
A practical way to think about your appointment
If your vehicle is known to be straightforward, you may be able to treat the visit like a half-day errand. If your vehicle has more involved electronics or security programming, plan for a longer appointment or a drop-off.
A careful shop may give you a time range instead of one exact promise. That usually means they understand how vehicle-specific this work is.
Before booking, customers usually want clear answers to a few simple questions:
- Can I wait for it? Sometimes yes, especially on simpler vehicles.
- Should I arrange a ride? That is often smart for vehicles with more involved integration.
- Why can't they promise an exact minute? Because some complexity only becomes clear once trim panels come off and the technician confirms how that vehicle is configured.
Understanding What Remote Start Installation Involves
If you've never seen one installed, it helps to picture the job as adding a new control switch into an existing electrical system. The remote start unit doesn't replace your car's wiring. It has to connect to it cleanly and safely.
That's why installers compare it to house wiring. If you add a new light switch at home, you don't just twist random wires together and hope for the best. You identify the right circuit, confirm what each wire does, make the connection, and test the whole system before closing the wall back up.
Here's the same idea in car form:
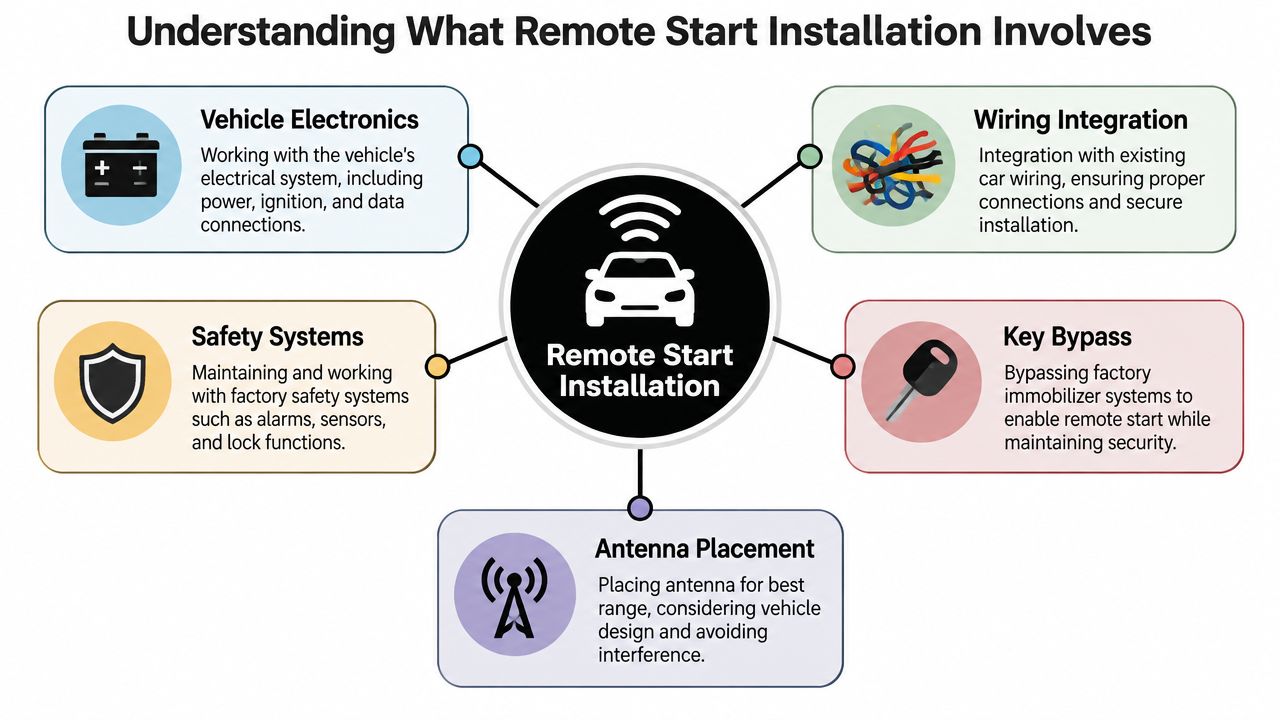
What the installer is actually doing
The work usually starts with protecting the interior and disconnecting the battery. After that, the technician removes lower dash or steering-column trim to reach the circuits the remote start system needs to interact with.
From there, the job becomes very methodical.
- Identify the needed circuits. These can include ignition, accessory, starter, power, ground, and factory security-related wiring.
- Verify wires with a multimeter. Good installers test instead of guessing.
- Integrate the remote start hardware. The goal is a clean connection that works reliably.
- Program the bypass or interface module. On many vehicles, this is what allows the remote start to work with the factory immobilizer system.
- Test every function. Start, shutdown, brake input, door behavior, and safety operation all need to act correctly before reassembly.
Why this takes care and not just speed
People sometimes see a remote start brain, antenna, and harness laid out on a bench and think the install must be quick because the parts are small. But small parts can still connect to important systems.
A remote start system touches the vehicle's starting logic. That's why clean wire identification and testing matter more than rushing.
An installer also has to think about where hardware goes. The antenna needs sensible placement. Wiring has to be routed so it doesn't interfere with trim, steering components, or pedals. Modules should be mounted securely, not left rattling behind the dash.
What “integration” really means in plain English
Integration means the new system has to behave like it belongs in the car. When you press the remote start button, the vehicle should respond in a predictable way. If you step on the brake without the key present, it should shut down correctly. If the factory security system expects a certain handshake, the module has to provide it.
That's why good installation is less like plugging in a lamp and more like teaching two devices to speak the same language.
Professional vs DIY Installation Time Compared
A remote start install can be a short shop visit on one vehicle and an all-day project on another. That is why the comparison is not just pro versus DIY. It is experienced vehicle integration versus first-time vehicle integration.
The remote start unit itself may be the same. The car is what changes the clock.
What professional install time looks like
A professional installer usually works faster because the job is familiar from the first panel removal to the final test. On a simpler vehicle with good access and a straightforward interface, the work may take only a few hours. On a late-model vehicle with tighter dash access, factory security, or extra programming steps, the same type of remote start can take most of the day.
That time difference confuses a lot of first-time buyers. The box did not change. The vehicle did.
A good way to picture it is house wiring versus appliance setup. Plugging in a toaster is quick. Wiring a new switch into an older wall box takes longer because you have to identify what is already there, make the new part work with it, and confirm it behaves safely afterward. Remote start installation follows that same pattern.
Professional installers also spend less time on wrong turns. They already know how to remove trim cleanly, where common ignition and data connections are likely to be, how to verify circuits with a meter, and how to complete the programming sequence without stopping to re-read each step.
Why DIY often takes longer
DIY time stretches because you are doing two jobs at once. You are installing the system, and you are learning the process.
For many first-time installers, the biggest time loss is not making a connection. It is pausing to confirm whether a wire is the correct one, whether a panel clips out or slides back, or whether the module accepted programming. Those pauses add up fast.
Common slowdowns include:
- Vehicle research from scratch. You have to figure out how your specific make, model, and year are set up before the work even starts.
- Tool gaps. A missing trim tool, test light, meter, or charger can stop the project cold.
- Wire verification. Colors alone are not enough, so checking circuits safely takes patience.
- Programming retries. A missed step can mean starting the setup process again.
- Reassembly after testing. Many DIY installers leave trim loose until they are sure everything works, which means more time at the end.
Side-by-side comparison
| Factor | Professional Install | DIY Install |
|---|---|---|
| Typical timeline | Often a few hours on a simpler vehicle, but much longer on vehicles with heavier factory integration | Varies widely based on experience, tools, and how much troubleshooting is needed |
| Vehicle research | Usually part of the technician's normal workflow | Often starts from zero with owner-led research |
| Wire verification | Done with a meter and a repeatable process | Slower for first-time installers learning circuit identification |
| Programming | Familiar step for trained installers | Common point of confusion and delay |
| Risk of trim damage | Lower with routine panel removal | Higher if dash disassembly is new to you |
| Troubleshooting time | Usually shorter because the installer has seen similar issues before | Can stretch the project far beyond the planned window |
| Best fit | Drivers who want predictable timing and clean integration | Hobbyists comfortable with automotive electrical work |
Which option fits your situation
DIY can make sense if your vehicle is simpler, you already have the tools, and you are comfortable testing automotive circuits carefully. Professional installation usually makes more sense if the car has push-to-start, factory immobilizer logic, limited dash space, or any setup where one missed step can turn into hours of diagnosis.
The key point is simple. You are not paying only for parts to be mounted. You are paying for the new system to speak the car's language correctly the first time.
Key Factors That Affect How Long Installation Takes
When customers ask why one car takes a morning and another takes most of the day, I usually point them back to the vehicle itself. The remote start unit may be similar. The path into the car's electronics is not.
Here are the main variables that change the timeline.
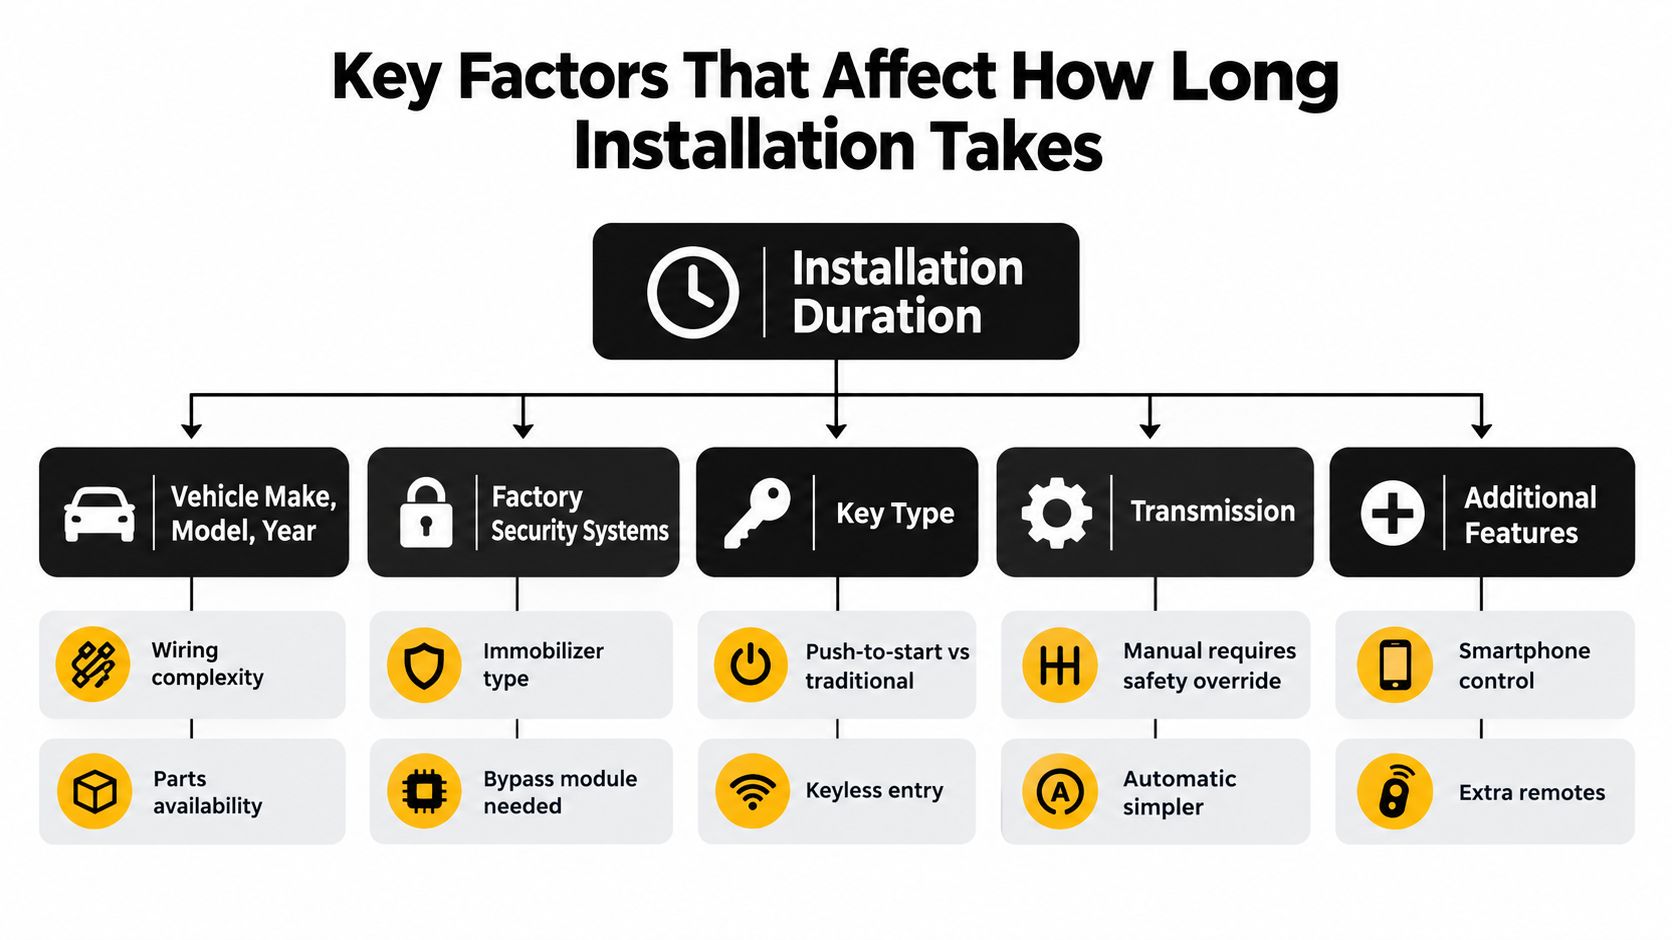
Vehicle make model and year
Some dashboards come apart cleanly and give the installer room to work. Others pack more electronics into tighter spaces, which slows access and routing.
Late-model vehicles often bring more integration steps. Some brands are also less forgiving with factory electronics and module communication.
Factory security and immobilizer systems
This is one of the biggest causes of longer installs. If the vehicle uses an immobilizer or other factory anti-theft logic, the remote start has to work with that system instead of fighting it.
That often means extra bypass programming and extra testing before the car will remote start correctly.
Key type and starting system
A traditional keyed ignition and a push-to-start system don't always involve the same kind of integration. Push-to-start vehicles can require more setup because the installer is dealing with button-start logic instead of a simple mechanical key sequence.
That doesn't mean push-to-start is bad for remote start. It just means the work can be more layered.
Transmission and safety requirements
Manual transmission vehicles usually need added attention because the system has to preserve safety. The installer must be sure the vehicle can't remote start in an unsafe state.
Automatic transmission vehicles are generally more straightforward in this area.
Added features and extra modules
The more functions you ask the system to handle, the more setup and testing it may need. Examples include smartphone control, extra remotes, alarm integration, or additional bypass hardware.
A useful self-check before you book:
- Know your exact vehicle details. Year, make, model, trim, and engine matter.
- Check your key style. Traditional key, proximity fob, or push-button start all point to different integration paths.
- Think about add-ons. If you want security features too, mention that up front.
- Mention manual transmission immediately. Shops need that information early.
- Ask if your vehicle needs a bypass module. That often affects planning.
What to Expect During Your Installation Appointment
A remote start appointment feels less mysterious when you know the rhythm of the day. Most shops follow the same general sequence, even though the exact timing can shift by vehicle.
Here's the process in a simple visual.
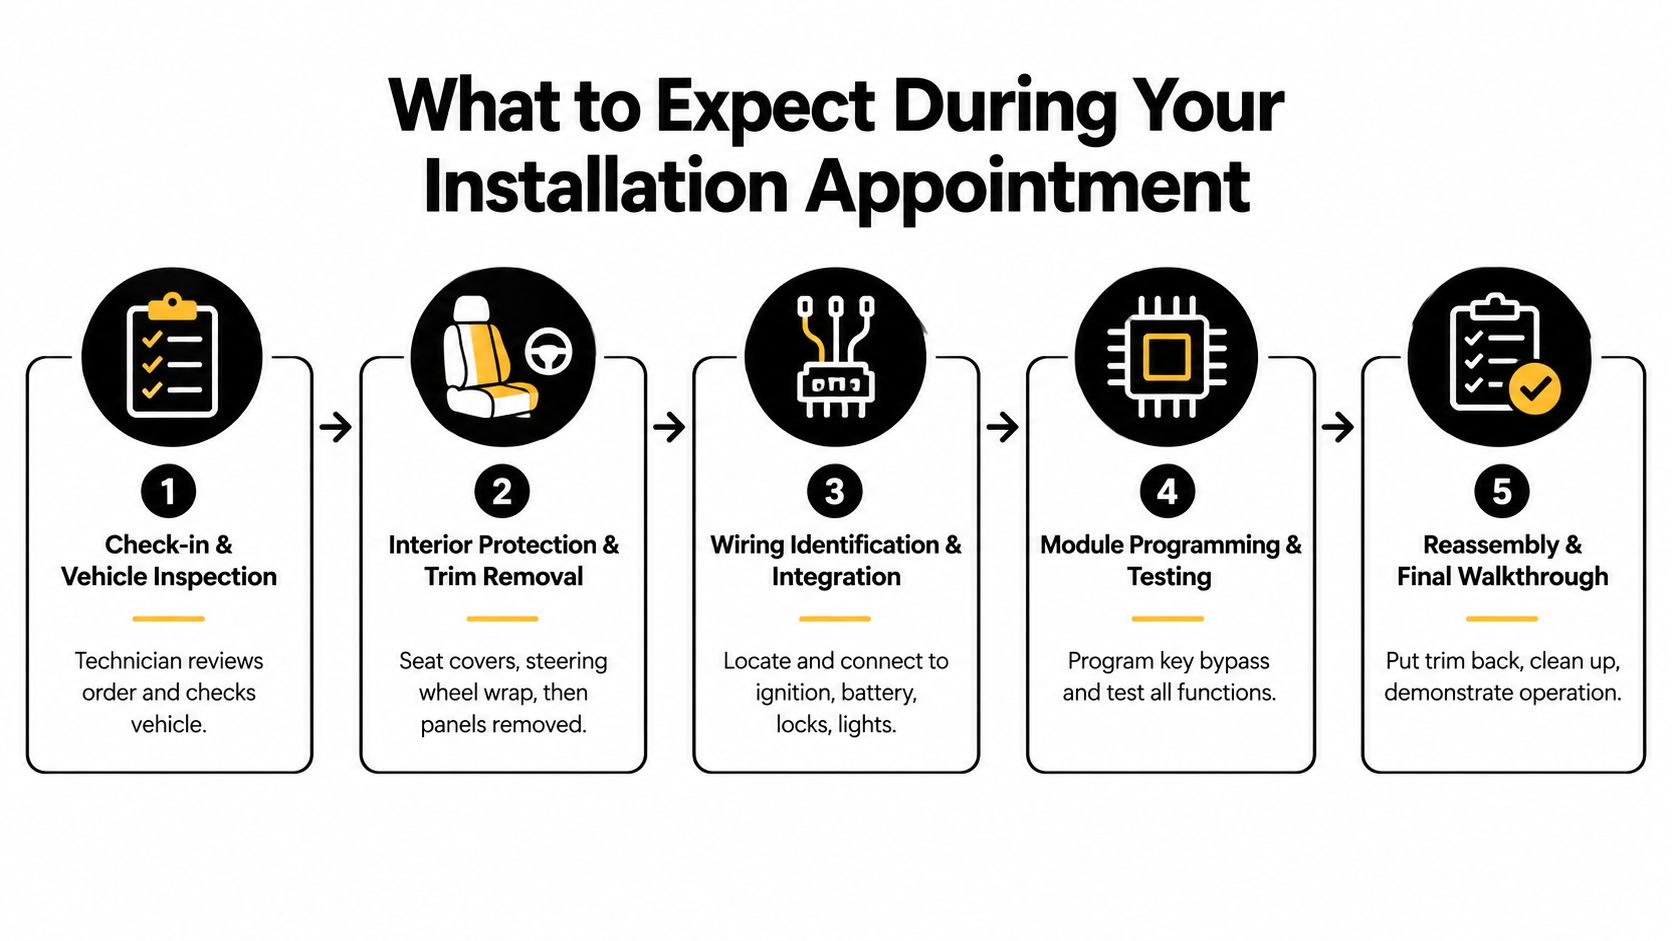
Check-in and vehicle review
At the start, the shop confirms the vehicle, the key type, and the system being installed. This is also when they note any special requests, such as longer-range remotes or extra features.
You may be asked to leave all keys and fobs. That's normal. If a module needs to learn the vehicle, missing a key can stop the process.
Interior protection and access work
Next comes seat covers, steering wheel protection, and careful trim removal. Lower dash panels and steering-column covers are common access points because that's where many important circuits are found.
This part can look dramatic if you peek into the bay. Panels may be off, but that doesn't mean anything is wrong. It's the access stage.
Wiring integration and module setup
This is the deep-work portion of the appointment. The installer identifies the necessary wires, confirms them with a multimeter, makes the connections, and mounts the hardware where it belongs.
Then comes module programming. Sometimes that goes smoothly. Sometimes the vehicle needs extra attention before everything syncs the way it should.
Good sign: A shop that spends time testing before reassembly is protecting you from callbacks later.
Final testing and reassembly
Before your car is buttoned up, the technician should test remote start function, shutdown behavior, and safety inputs. They'll also confirm the vehicle acts normally with regular key operation.
Once testing is complete, trim goes back on and the interior gets cleaned up. At pickup, a good installer will show you how to use the system instead of just handing you the keys.
What customers usually notice at pickup:
- How to start and stop the system remotely
- What happens when you enter the vehicle
- Any factory behavior that changes slightly
- How far the remote can realistically be expected to work in daily use
- What to do if the vehicle doesn't remote start on the first try
That's why shops often quote a time window instead of an exact hand-back minute. The visible part is simple. The careful testing is what protects the finished job.
Tips to Schedule and Speed Up Your Remote Start Install
A good remote start appointment often starts with one simple phone call done right.
Two cars can use the same remote start system and still need very different amounts of shop time. The reason is not the box being installed. The reason is how that box has to fit into your vehicle's wiring, security system, key style, and factory electronics. Good scheduling helps the shop line up the right parts and the right amount of time before your car ever comes in.
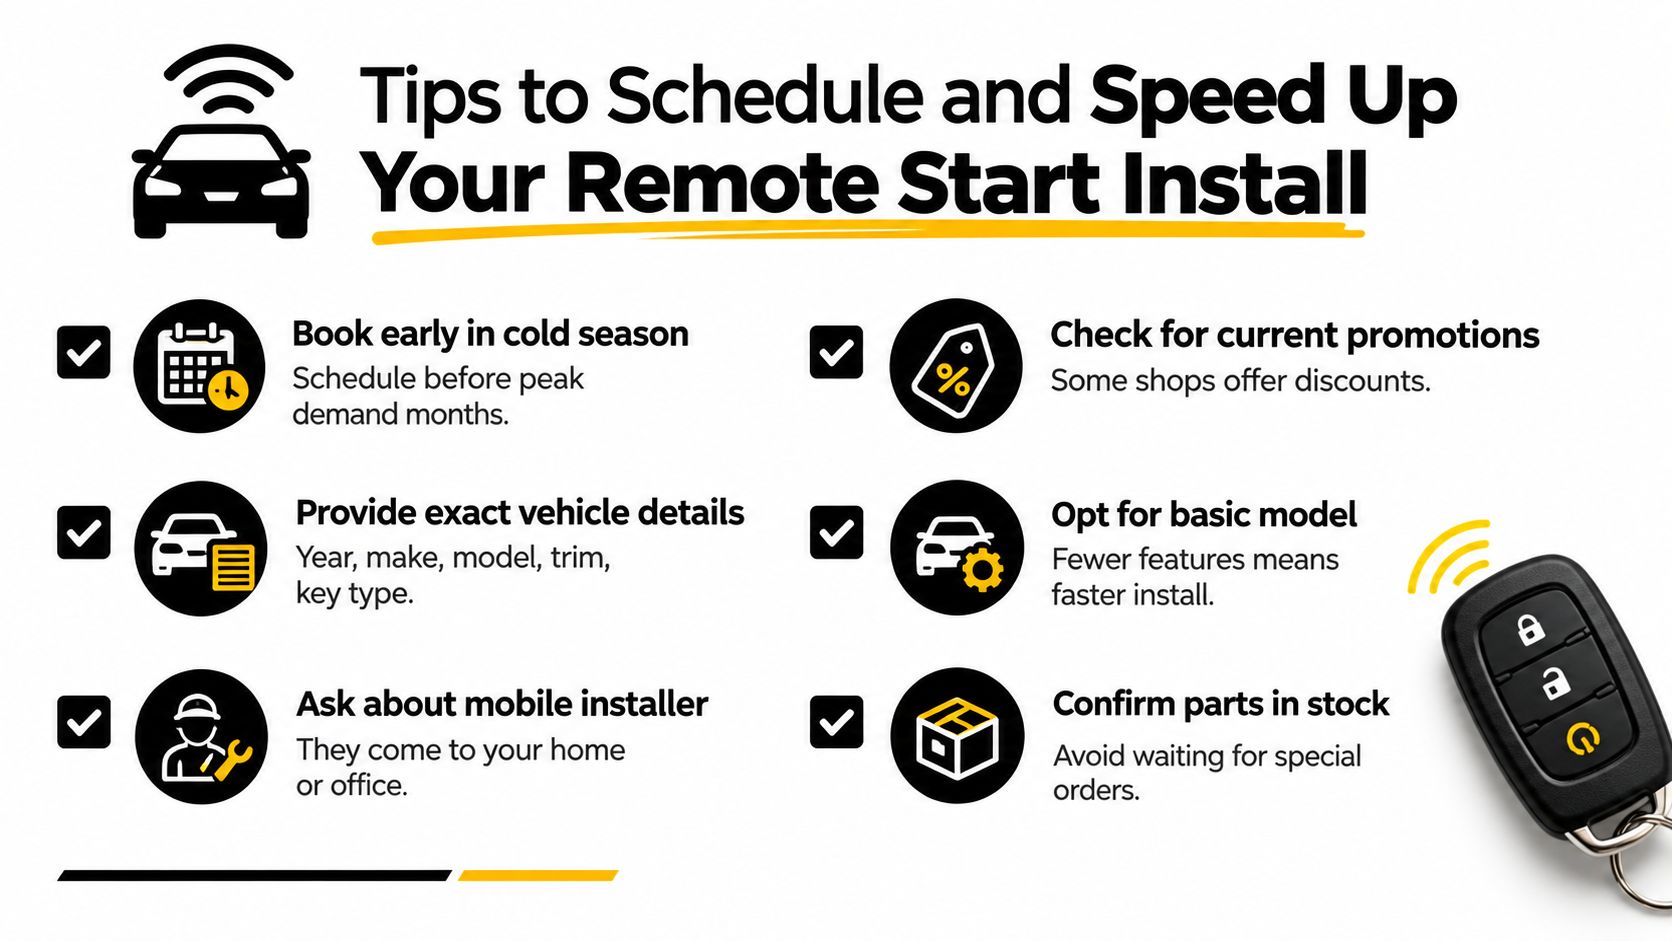
Information that helps the shop prepare
Start with the full vehicle ID. Give the year, make, model, trim, and whether the car uses a physical key, smart key, or push-button start. That level of detail tells the installer a lot, much like having the exact part number before fixing an appliance.
It can change the plan right away. One trim level may accept a straightforward interface module, while another needs extra programming steps or different harnesses. A local Delaware installer such as Audio Jam Inc may also ask about aftermarket alarms, prior electrical work, or missing factory remotes, because those details can affect how quickly the job moves.
Shops that use vehicle-specific integration brands such as iDatalink or remote start systems from Alpine can often order or pull the right parts ahead of time. That cuts down on the most avoidable delay. Waiting on a module that only fits your vehicle.
Small things customers can do that actually matter
A few customer-side details save time because they remove roadblocks before the installer starts.
- Bring every key and fob. Some vehicles need all programmed keys present during setup.
- Clear the front interior area. Empty the footwells, center area, and anything stored under the dash.
- Charge or replace a weak battery first. Programming and testing go more smoothly when the vehicle voltage is stable.
- Mention add-ons before the appointment. Smartphone control, security features, or trunk release can change the parts list and labor time.
- Say if anything electrical already acts strange. Intermittent locks, warning lights, or battery drain problems can slow diagnosis.
These are small steps, but they work like laying out tools before a repair. The job still takes skill, but the installer wastes less time stopping and restarting.
Best timing for scheduling
Season matters.
The first stretch of cold weather usually fills the calendar fast, especially for daily-driver vehicles that owners want warmed up before work. Booking earlier gives you more choice in drop-off time and gives the shop more room to match your vehicle with the right parts.
It also helps to ask one practical question when you schedule: Is my vehicle usually a wait appointment, or is it better as a drop-off? That question often gets you the clearest answer about complexity. A simple vehicle may be in and out the same day with a tighter window. A vehicle with tighter dash access or more security integration may be better left for several hours so the technician is not rushed.
Bring accurate vehicle information. Bring all keys. Mention feature requests early.
Those three steps will not turn every install into a short one, because remote start time is still tied to the vehicle itself. They do make the appointment more predictable, which is what most drivers want.
Planning Your Remote Start Installation With Confidence
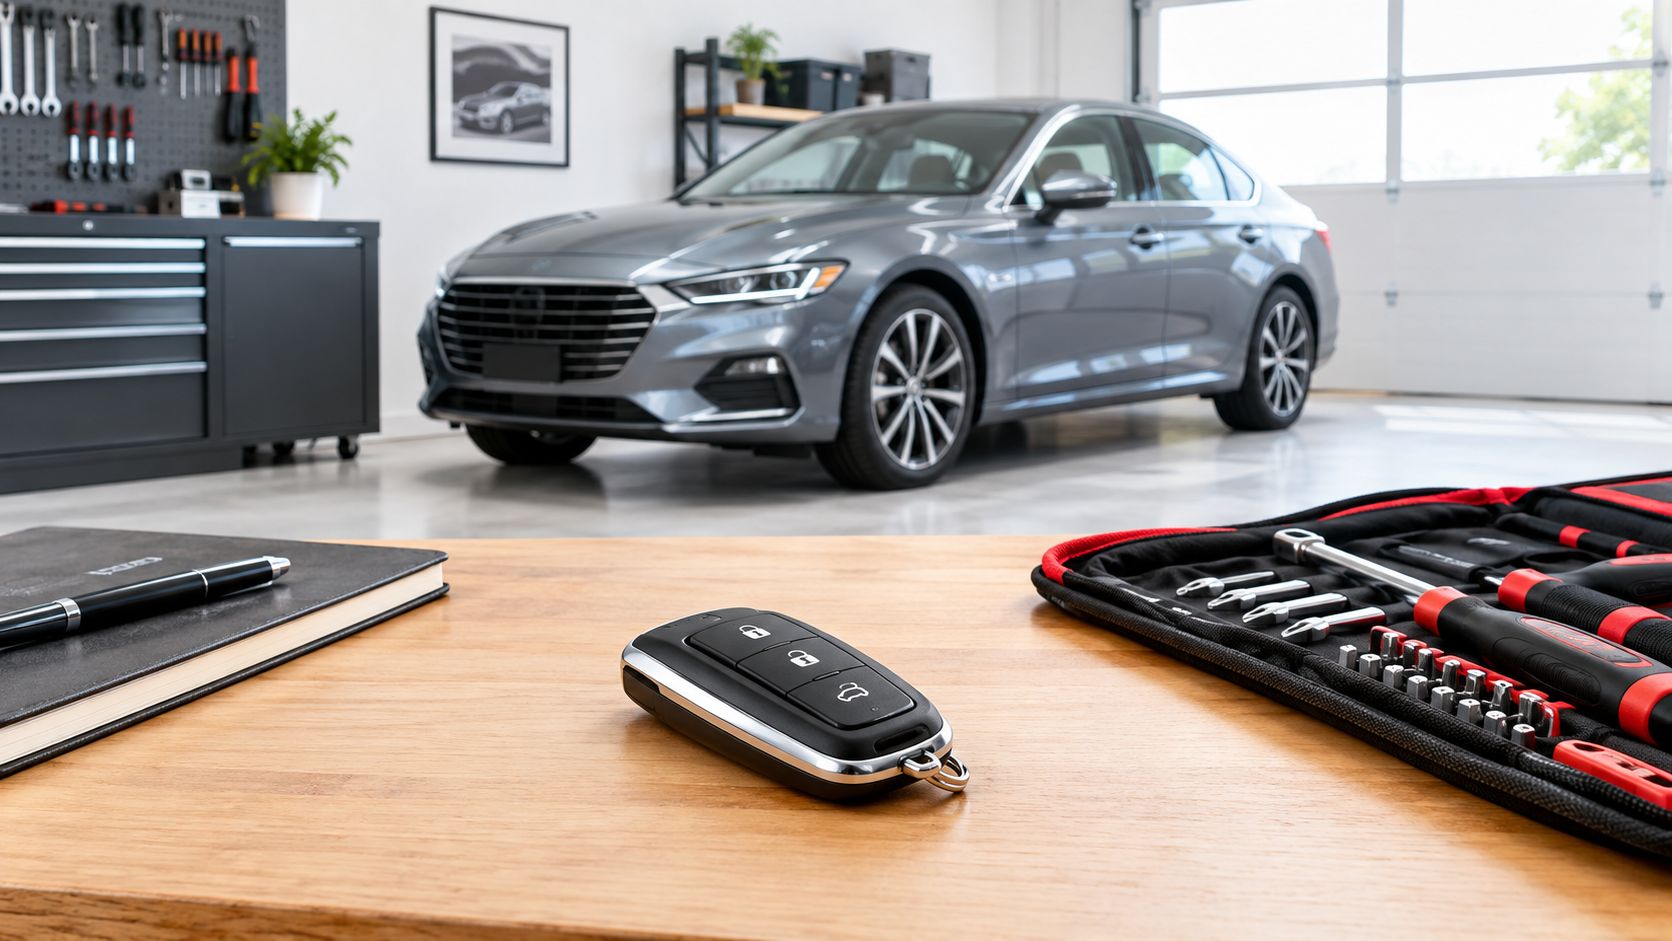
A good plan starts with one clear idea. Remote start install time follows the vehicle, not the box the remote start came in.
That is why the same system can be a half-day job on one car and an all-day job on another. One vehicle may offer easier wire access and simpler programming. Another may require tighter dash work, more security integration, and extra setup so the car starts, runs, and shuts down the way it should.
When professional installation makes more sense
Some vehicles leave very little room for trial and error.
If your car has push-to-start, factory anti-theft features, or crowded dash panels, the job works more like fitting a new part into an existing puzzle than plugging in an accessory. The installer has to connect the remote start to the car's ignition, safety, and data systems without upsetting anything else. That is where experience saves time and avoids small mistakes that can turn into warning lights, no-start issues, or trim damage.
A professional install also helps if you want the finished result to feel factory-like. Clean wire routing, proper module mounting, and careful reassembly matter just as much as getting the engine to start from the fob.
When DIY can still be realistic
DIY is still a reasonable path for car owners who already handle electrical repairs and have the tools to test circuits the right way.
A remote start install is part wiring job, part software setup. You are not only connecting wires. You are also teaching modules how to talk to the vehicle. If you are comfortable reading diagrams, checking each connection with a meter, and working patiently with programming steps, DIY may fit your skill set.
If those tasks sound unfamiliar, the learning curve usually shows up after the dash is apart.
The smartest step before you schedule
Ask for a vehicle-specific time estimate using your year, make, model, key type, and any features you want added. That gives you a more useful answer than a generic install window.
Good shops ask detailed questions for a reason. They are trying to match the parts, labor time, and programming steps to your exact vehicle. That is the clearest sign that they see remote start as an integration job, not a one-size-fits-all install.
Audio Jam Inc provides remote start system selection, compatibility guidance, and professional installation for Delaware drivers. If you want a time estimate based on your exact vehicle and key setup, contact their team directly with those details.













