


4 Channel Amp for Door Speakers How to Choose and Wire

You've upgraded the door speakers, turned the volume up, and still aren't hearing the improvement you expected. The vocals may sound thin, the midbass disappears when the music gets busy, and the rear speakers seem either too quiet or too aggressive. In many cars, the speakers aren't the weak point anymore. The factory radio can't provide enough clean, sustained power.
A 4 channel amp for door speakers can solve that problem, but it isn't automatically the right amplifier for every vehicle. The correct choice depends on speaker impedance, RMS power, available mounting space, ventilation, your factory integration plan, and whether a subwoofer will share the system. Here's how to choose and wire one without creating heat, noise, or tuning problems that show up after the install.
Table of Contents
- Why Door Speakers Come Alive With a 4 Channel Amp
- When a 4 Channel Amp Is the Right Choice and When It Is Not
- How to Match Power and Impedance to Your Door Speakers
- Wiring Your 4 Channel Amp to Factory or Aftermarket Systems
- Tuning Gains Crossovers and Protection for Clean Daily Sound
- Final Checklist Before You Buy and Install
Why Door Speakers Come Alive With a 4 Channel Amp
A common upgrade starts with four replacement speakers. The owner installs them, expects fuller sound, and discovers that the factory radio still runs out of breath as the volume rises. The new speakers may handle more power than the radio can provide, so the system sounds louder only briefly before vocals harden, cymbals become sharp, and bass loses control.
A four-channel amplifier changes the job assignment. Instead of asking the head unit to power every speaker directly, the amplifier gives each door its own powered channel. That separation provides more usable headroom, better control over the speaker cone, and a cleaner path for front-to-rear balance. It won't turn a small door speaker into a subwoofer, and it won't correct a bad installation, but it can let a properly matched speaker perform as intended.
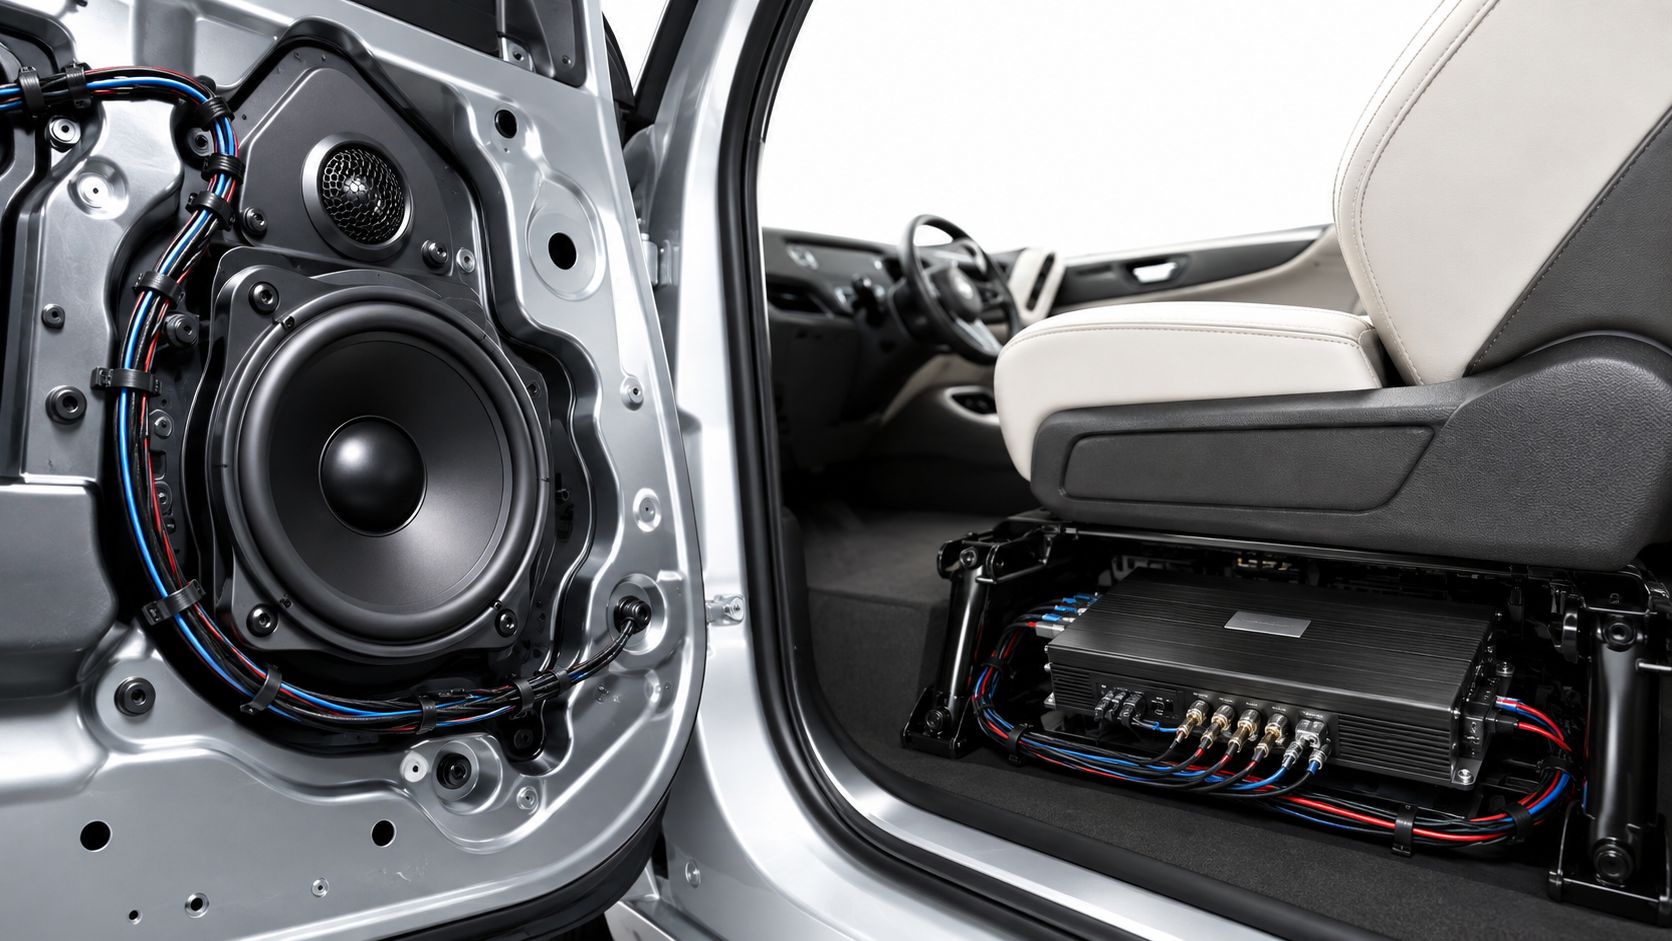
The format makes practical sense for a standard front-and-rear system. The global car amplifier market was valued at USD 2.3 billion in 2024, and the multi-channel segment represented about 54% of that market, according to Crutchfield's overview of car amplifier development. That market context reflects what installers see regularly, four channels remain a natural fit for full-range vehicle upgrades.
What the amplifier actually improves
A suitable amplifier can deliver:
- Cleaner dynamics: Music has more room to rise before the amplifier clips.
- Stronger midbass control: The door speaker receives more stable power, provided the door is sealed and damped correctly.
- Consistent front-to-rear output: Each speaker has a dedicated channel rather than sharing a strained radio output.
- Better upgrade flexibility: You can begin with door speakers and later add separate bass amplification.
The result should be cleaner and more controlled, not just louder. If the amplifier is too powerful, badly grounded, poorly ventilated, or fed a distorted signal, the extra hardware can make the system fail faster instead of sound better.
When a 4 Channel Amp Is the Right Choice and When It Is Not
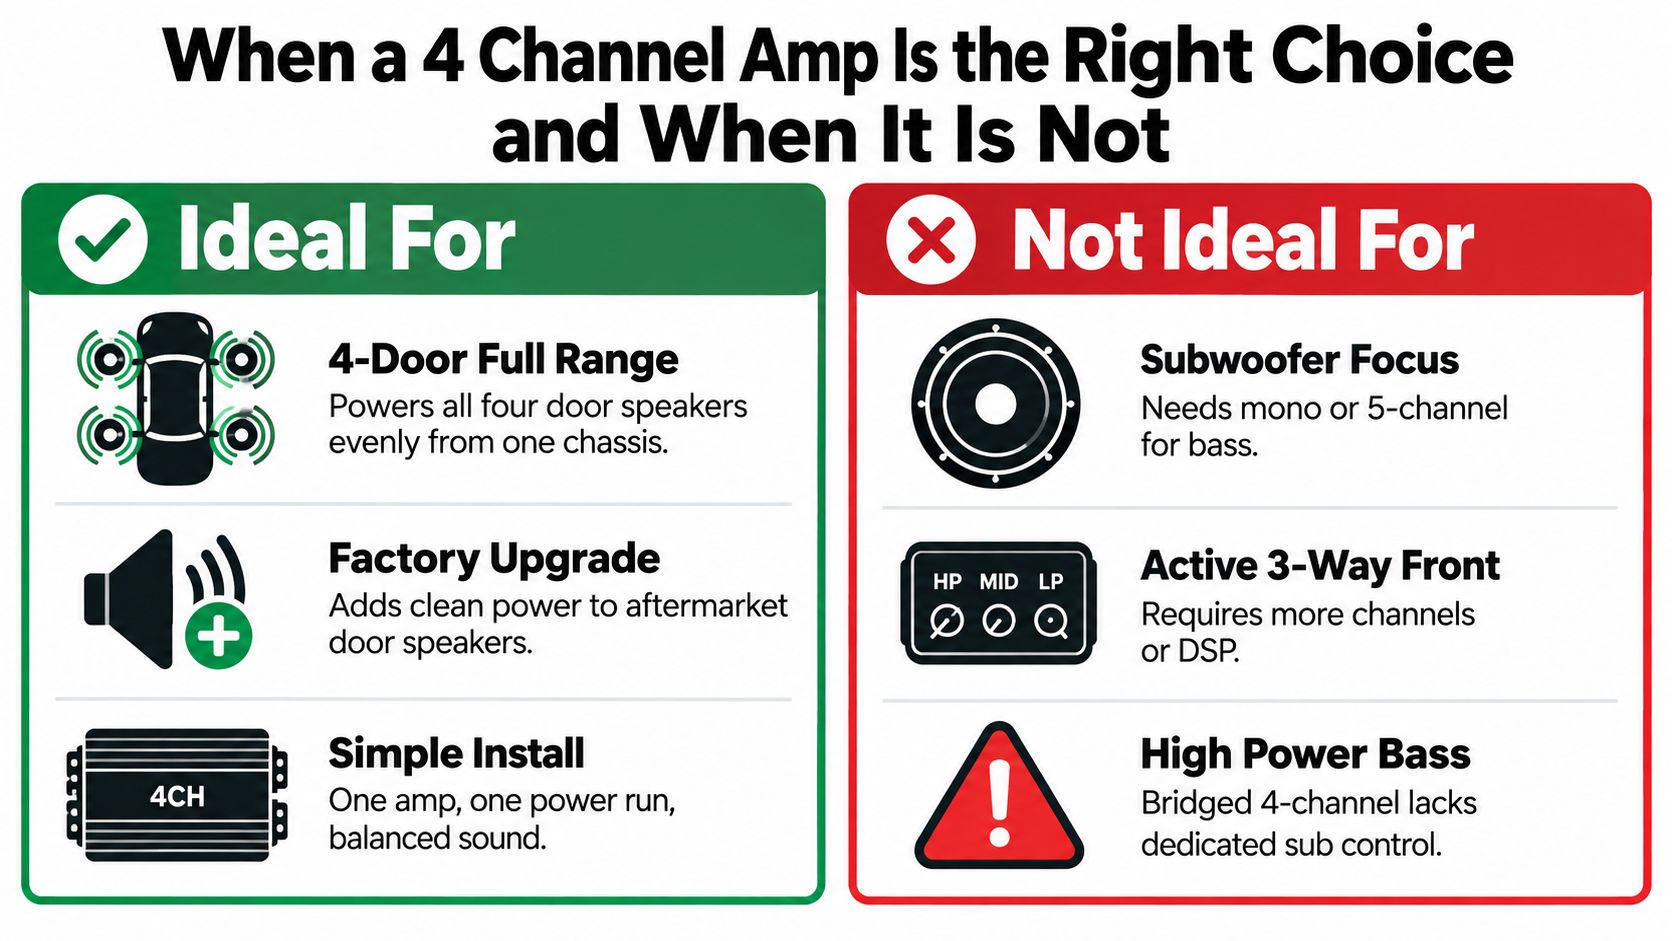
A single four-channel amplifier is a strong match for four full-range door speakers when the system has a clear division of labor. Channels one and two can run the front speakers, while channels three and four run the rear speakers. That arrangement keeps the install straightforward and preserves independent front-to-rear level control.
The decision changes when the same amplifier must also carry serious bass duties. You can bridge channels in some systems, but doing so reduces the number of independently powered door speakers and can limit future flexibility. A dedicated mono amplifier, or a suitable five-channel design, gives the subwoofer its own power section, crossover controls, and thermal workload.
Compare the system roles
| Choose a 4-channel amplifier when | Consider another layout when |
|---|---|
| You're powering four door speakers | A subwoofer needs substantial dedicated output |
| You want one amplifier for front and rear full-range sound | You need independent bass gain and filtering |
| The installation has room for a properly ventilated chassis | The only available location is enclosed or heat-prone |
| You may add a separate subwoofer amplifier later | You're building an active front stage or DSP-based system |
One independent guide recommends two amplifiers for a four-door system using 100W RMS, 4-ohm speakers with a subwoofer, rather than forcing one four-channel unit to serve every role. The practical reasoning is sound, a dedicated four-channel can handle the doors while another amplifier handles bass. See the door-speaker and subwoofer amplifier guidance from Taramps for that system-design perspective.
Compact chassis design creates another boundary. Smaller amplifiers are easier to mount, but a tight under-seat location or hot trunk can restrict airflow. Current buyers often prioritize cooler operation and stable output over inflated peak ratings, so judge the amplifier by its continuous RMS specification, protection features, mounting clearance, and heat path. A four-channel amp is the wrong choice if it physically fits only by being buried under carpet, pressed against a panel, or placed beside a heat source.
How to Match Power and Impedance to Your Door Speakers
Start with the speaker label, manual, or manufacturer specification. Find the RMS rating per speaker and the nominal impedance, then compare those figures with the amplifier's RMS output at the same impedance. Ignore maximum or peak wattage for this decision. RMS tells you what the system is designed to sustain under normal use.
For a typical 4-ohm door speaker, choose an amplifier that provides a similar RMS figure per channel. A modest mismatch isn't automatically dangerous, but the gain must be set correctly and the speaker must be mechanically capable of handling the signal. Factory speakers often have higher sensitivity than aftermarket replacements, so they may play loudly with less amplifier power even when their published RMS rating looks modest.
A practical matching table
| Door Speaker RMS per Speaker | Ideal Amp RMS per Channel at 4 Ohms | Notes for Real Installs |
|---|---|---|
| 50W | About 50W | A sensible target for efficient factory replacements and moderate aftermarket speakers |
| 75W | About 75W | Useful for upgraded coaxial or component speakers that need more headroom |
| 100W | About 100W | Better suited to robust aftermarket speakers, with careful gain setting and electrical planning |
The table is a matching guide, not a promise of equal loudness. A speaker's sensitivity, enclosure environment, door treatment, and crossover design affect the result. A 100W amplifier won't fix a loose door panel, a leaking vapor barrier, or a speaker adapter that allows air to escape around the basket.
Underpowering isn't automatically safer. If you push a small amplifier beyond its clean operating range, it can clip and send a harsh signal to the speaker. That clipped signal can heat a voice coil and sound worse than a properly set amplifier with a higher rating. The answer isn't to buy the largest amplifier available. It's to choose a sensible RMS match and set the gain so the amplifier reaches the intended output without clipping.
Think about bridging before you buy
Bridging combines two amplifier channels to drive one load. That can be useful for a later small subwoofer or a stronger pair of speakers, but it comes with restrictions. The amplifier must support bridged operation, the speaker impedance must fall within the bridged rating, and the remaining channels must still serve the rest of the system.
If you need four independently powered doors today, don't buy a four-channel amplifier assuming bridging will preserve all four channels. It won't. Verify the manual's wiring diagram, minimum bridged impedance, filter operation, and thermal guidance before planning around that feature.
Wiring Your 4 Channel Amp to Factory or Aftermarket Systems
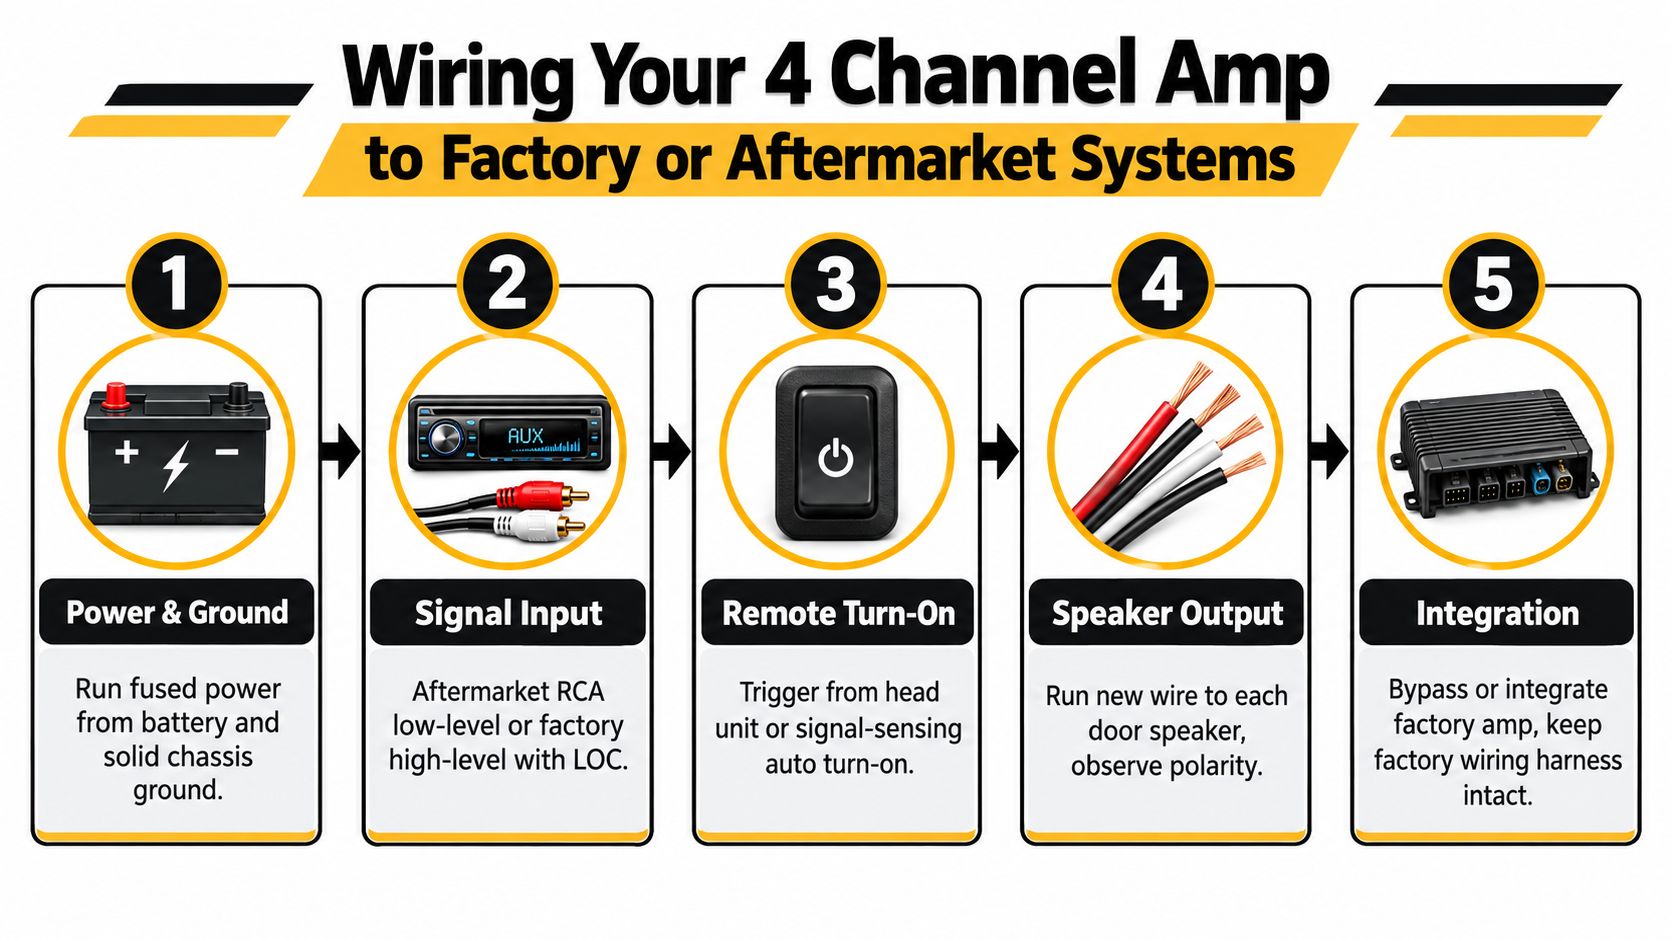
Power wiring follows the same basic path in most vehicles, but the signal path changes sharply between factory and aftermarket systems. Run fused power from the battery, ground the amplifier to clean chassis metal, connect the turn-on trigger, provide the correct audio input, and run the amplifier's outputs to the door speakers.
The fuse belongs close to the battery on the amplifier's power cable. Its purpose is to protect the cable if it shorts, not to act as a substitute for correct cable sizing. Keep power and signal wiring separated where practical, secure every cable against abrasion, and leave enough service slack to remove the amplifier without pulling on terminals.
Choose the right signal path
An aftermarket head unit usually provides RCA preamp outputs. Run the front RCA pair to channels one and two, and the rear pair to channels three and four. If the radio provides only one stereo pair, use the amplifier's input mode or suitable signal distribution to feed all four channels, then confirm whether front-to-rear fade control remains available.
A factory radio may send speaker-level output directly to the doors, or it may feed a separate OEM amplifier. In the first case, an amplifier with high-level inputs can accept the factory signal directly. A line output converter can also convert speaker-level output to RCA-level signal when the amplifier lacks suitable high-level inputs.
The speaker outputs from the new amplifier must replace the powered door-speaker path. Don't connect an amplifier output in parallel with the factory radio output. Isolate the original powered outputs, then route the new channel outputs to the corresponding speakers while preserving polarity.
Wiring warning: Never connect a new amplifier's speaker outputs to an active factory amplifier output. Identify the signal source, isolate the original speaker-power path, and confirm the vehicle's integration requirements before applying power.
Factory fade control needs deliberate planning. If the OEM system uses separate front and rear outputs, retain those channels through the LOC or high-level input. If the factory amplifier processes the signal, you may need a vehicle-specific interface or a carefully planned bypass. The technical wiring guide from Improve Car Audio covers the routing choices, including RCA inputs, LOC use, high-level inputs, and factory integration concerns.
For a visual walkthrough of the process, use this four-channel amplifier wiring video.
Tuning Gains Crossovers and Protection for Clean Daily Sound
Tuning should verify the installation, not compensate for a poor speaker match. Set the amplifier's input gain with a clean test signal and a multimeter when possible. Calculate the target AC voltage from the desired power and speaker impedance, then adjust the gain until the meter reaches that target without activating a clipping indicator or producing audible harshness.
Set the signal before the volume
Begin with the head unit's tone controls flat and disable loudness or bass boost. Set the radio to a clean high listening level below the point where it distorts, then adjust the amplifier gain one channel pair at a time. If the source signal is already clipped, reducing the amplifier gain won't restore clean audio.
Door speakers generally benefit from a high-pass crossover. A starting point around 80Hz is common for protecting small midbass drivers, but the correct setting depends on the speaker, door enclosure, and whether a subwoofer is present. Raise the high-pass point if the door speaker sounds strained, then lower it carefully only when the speaker and installation remain clean.
Check balance and heat
Use the fader to establish a natural front stage. Rear speakers should support the cabin rather than pull the vocal image behind the driver. Make small adjustments, then listen from the normal driving position with familiar recordings.
Protection circuits are useful only when the installation allows the amplifier to cool. Leave the manufacturer's recommended clearance around the chassis, keep vents uncovered, and don't trap the amplifier beneath dense carpet. After tuning, play the system long enough to reach normal operating temperature, then check for thermal shutdown, fading output, hot terminals, or a protection light.
A system that sounds clean for a few minutes but shuts down after heat soak isn't tuned successfully. It's undersized, poorly ventilated, incorrectly loaded, or suffering from an electrical problem.
Inspect speaker wires for pinched conductors and confirm that no terminal strands can touch the chassis. If distortion appears only at high volume, reduce the gain or raise the high-pass crossover before assuming the speakers are defective. Clean, sustained output matters more than a dramatic specification printed on the amplifier's box.
Final Checklist Before You Buy and Install
Before ordering a 4 channel amp for door speakers, write down the actual system requirements. Confirm the RMS rating and impedance of every door speaker, then compare them with the amplifier's per-channel RMS output at that load. Check whether the amplifier accepts RCA, high-level input, or both, and decide how the factory radio, OEM amplifier, and fade controls will be handled.
Physical fit deserves the same attention as electrical output. Measure the amplifier chassis, mounting depth, terminal access, and ventilation clearance. An amplifier that fits on paper may fail in practice if the cables bend sharply, the seat blocks airflow, or the enclosure traps heat.
Pre-install audit
- Speaker load: Confirm each speaker's impedance and RMS rating.
- Channel plan: Assign front and rear speakers before running cable.
- Bass plan: Decide whether the system needs a separate mono amplifier or a different multi-channel layout.
- Signal integration: Identify RCA, high-level, LOC, or OEM amplifier requirements.
- Power protection: Plan the battery fuse, power cable route, ground point, and turn-on trigger.
- Mounting: Leave room for ventilation and service access.
- Verification: Prepare a multimeter, test tones, polarity check, wire tools, and secure mounting hardware.
If the vehicle has a complex factory amplifier, active processing, warning tones, or integrated controls, professional installation can prevent expensive trial and error. A clean installation also protects the factory harness and makes future service easier.
Audio Jam Inc offers 4-channel amplifiers, including the Alpine S-A32F, along with car audio installation support for amplifier and speaker upgrades. Visit Audio Jam Inc to review available equipment and arrange help with a properly matched, ventilated, OEM-compatible installation.













